

Appearance
Your first session
The demo board (820-00000, a made-up 13-inch laptop) has a fault tree and a simulated meter that answers in whatever mode a step asks for. It runs signed out, with no meter plugged in, so it is the quickest way to learn the screens. This walk-through takes it from the symptoms to a confirmed repair.
The demo has no boardview
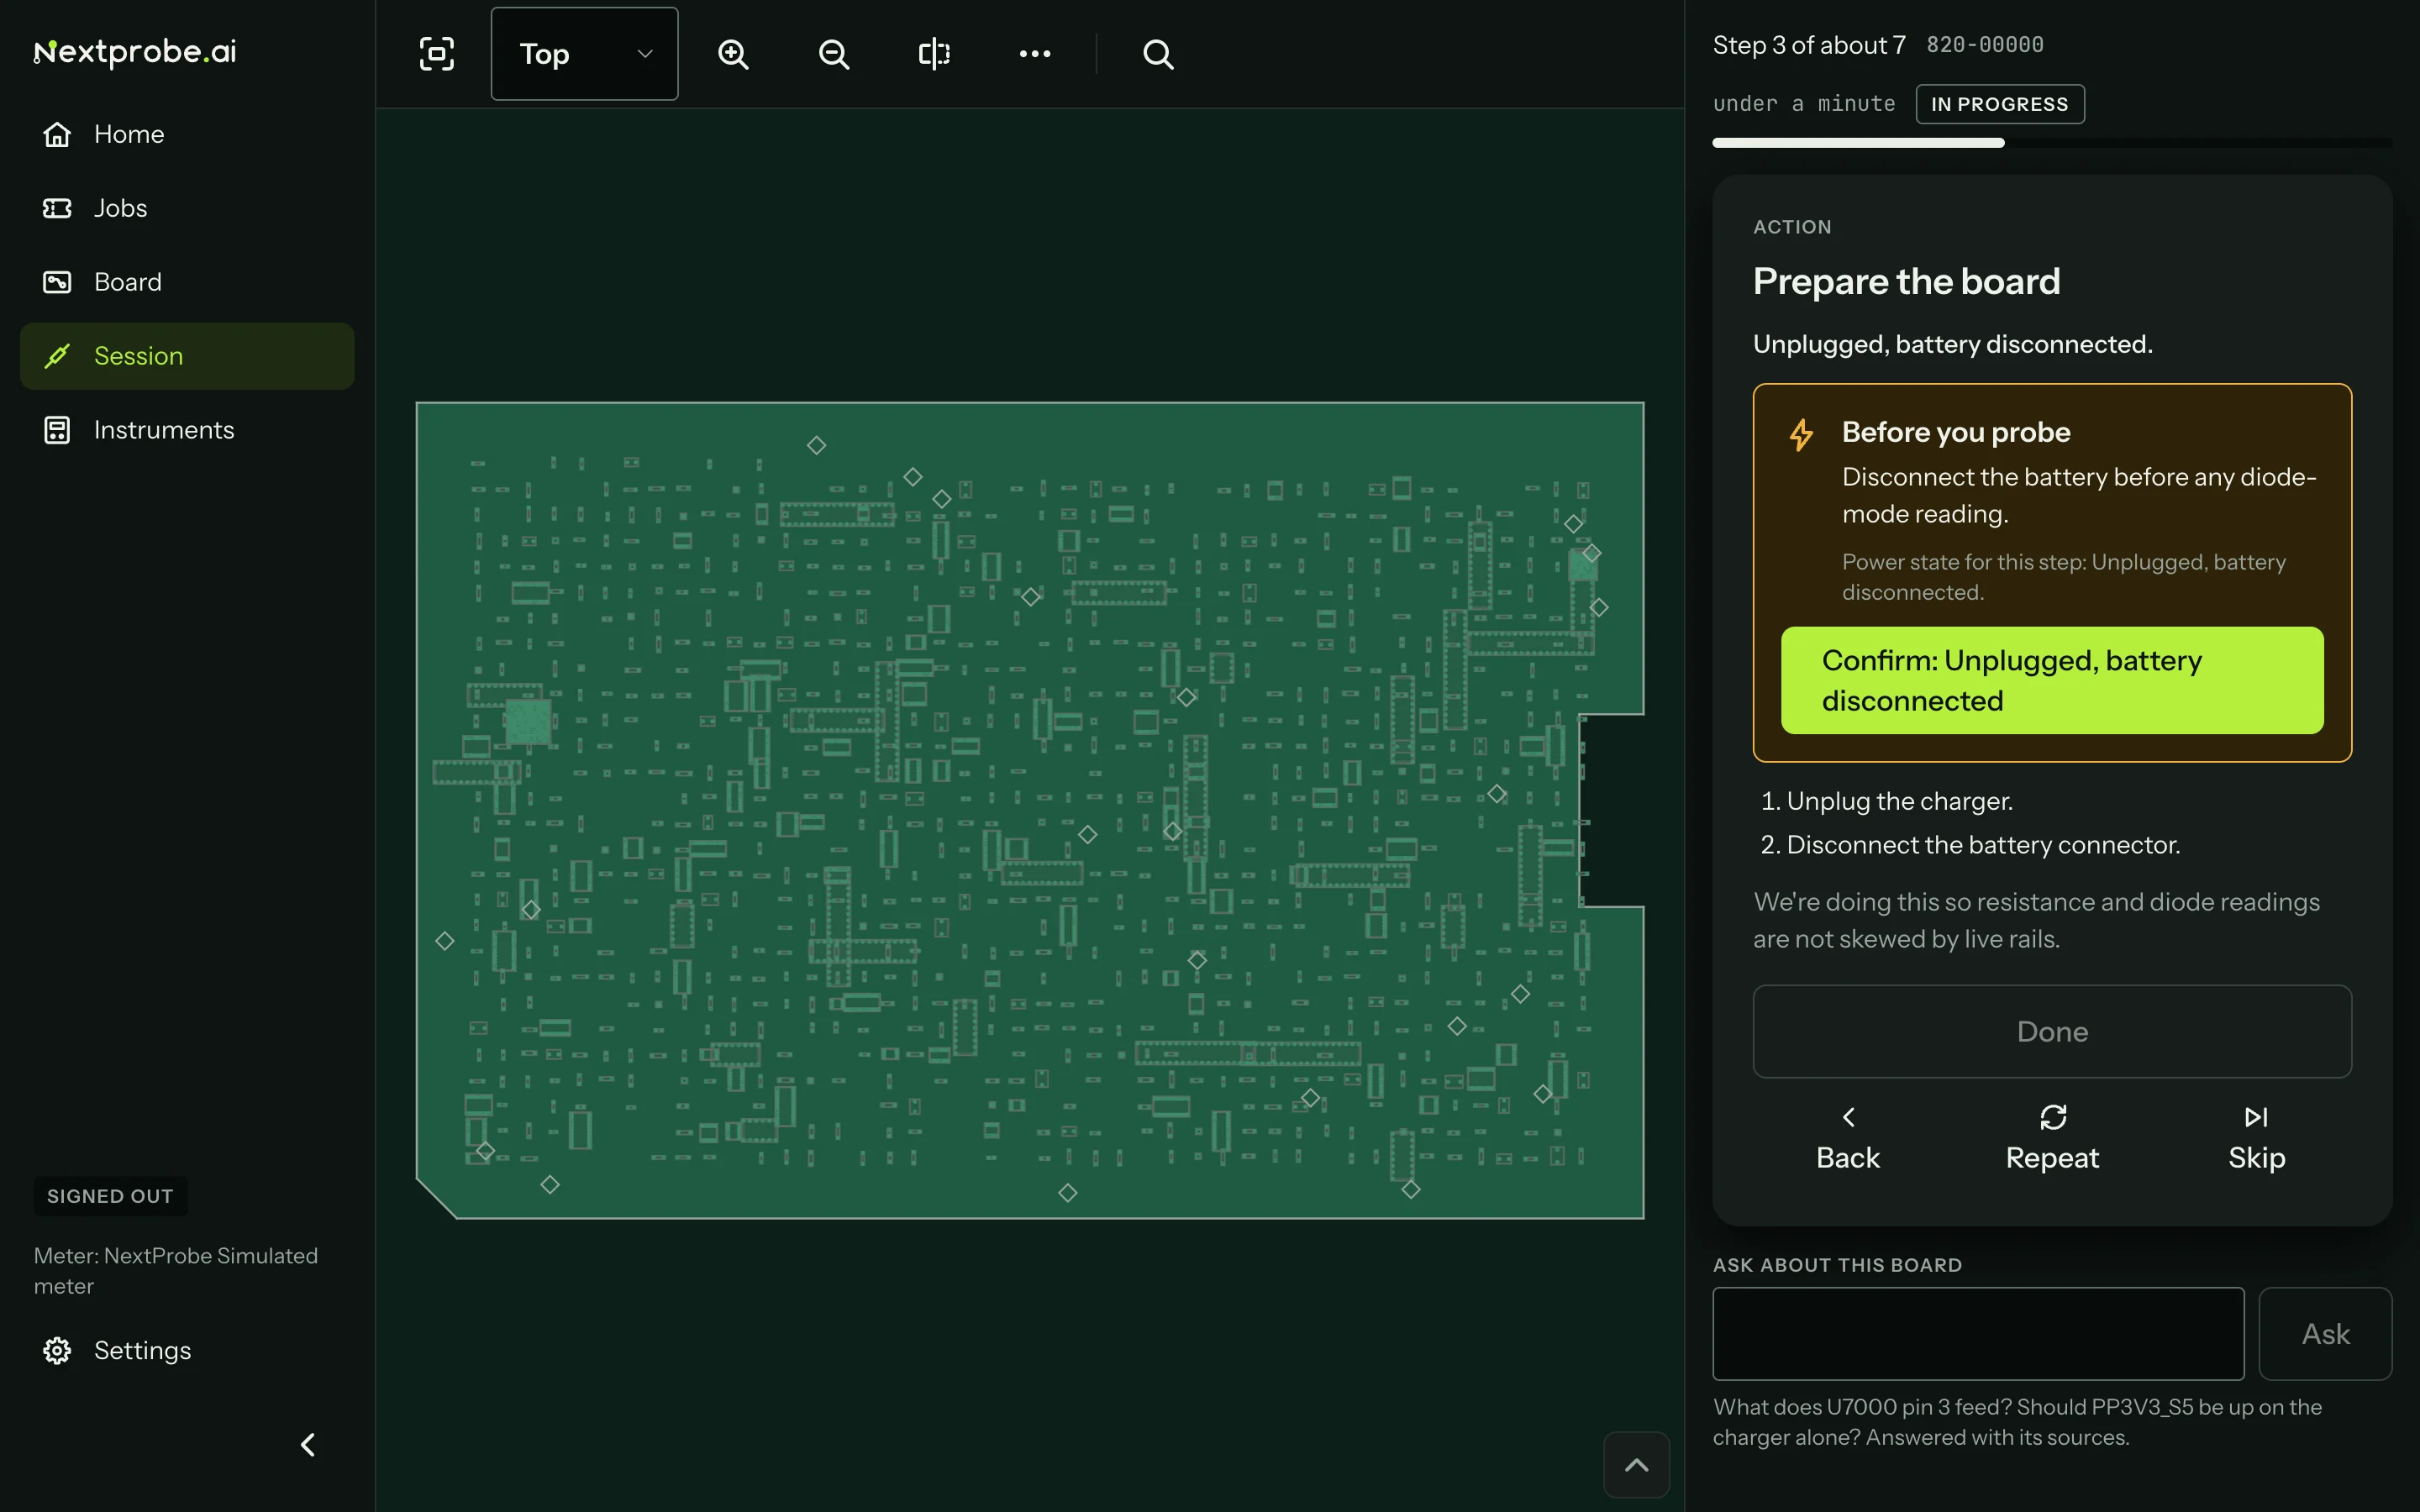
In the app the demo board has no board file, so the board pane says No board file open and names each point instead. The pictures here show the board drawn so you can see where the leads go. With your own boardview open, a real board lights up the same way.
1. Pick the demo board
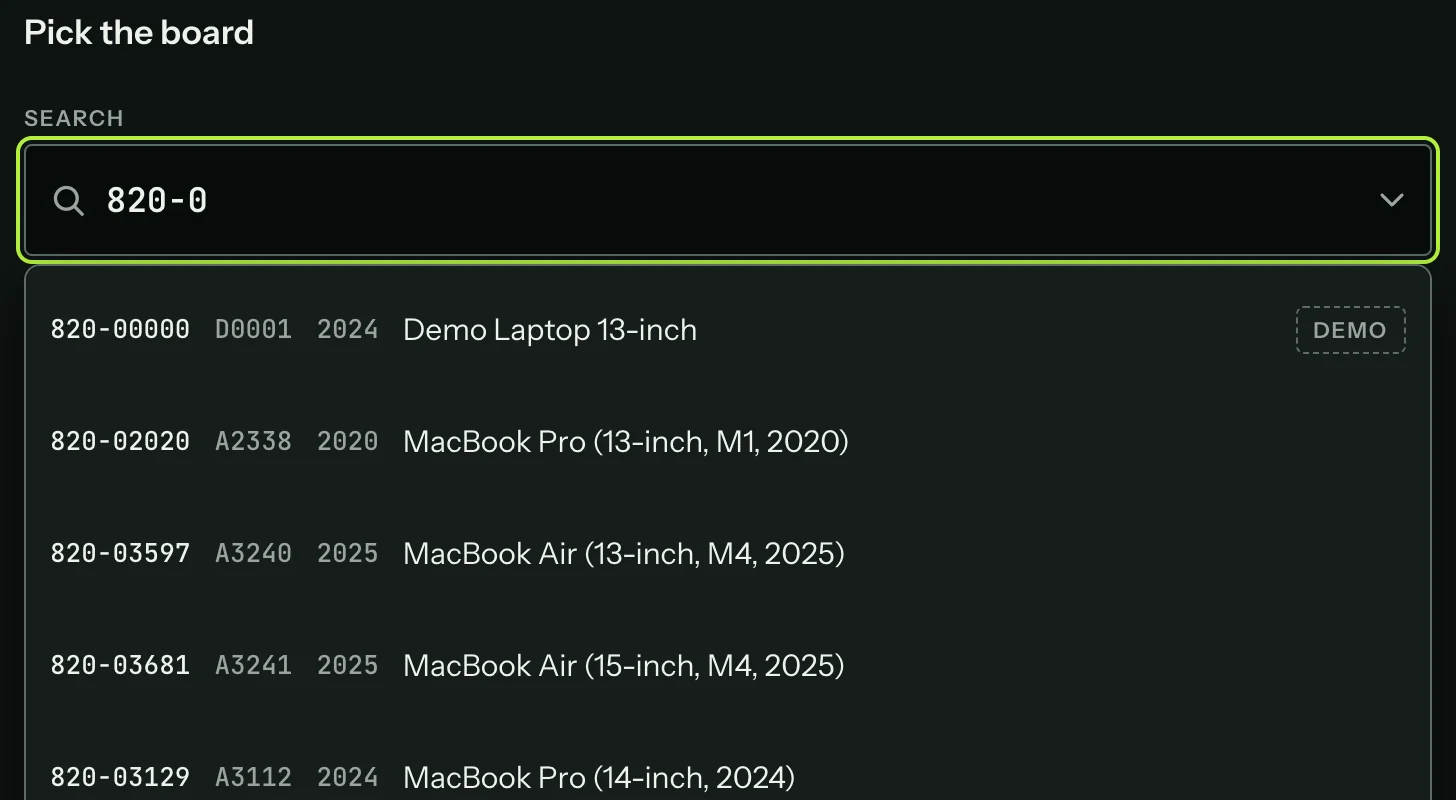
On Home, type 820-00000 into the search under Pick the board, and pick Demo Laptop 13-inch.
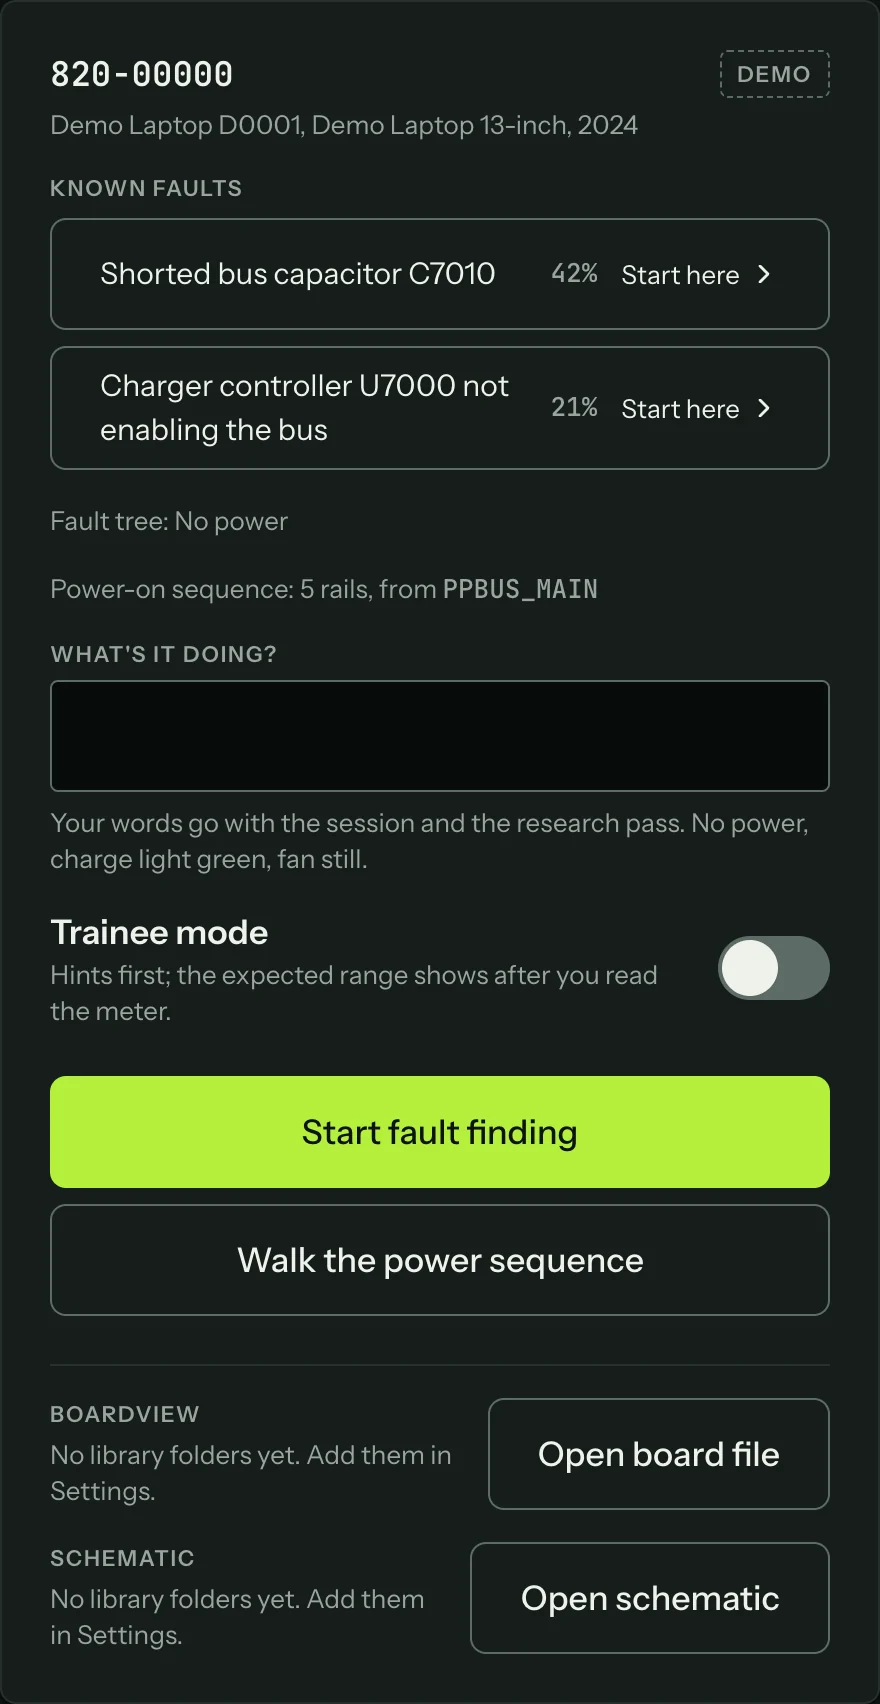
The board card opens on the right: the known faults with how often each was the fix, the fault tree, and the power-on sequence.
2. Start fault finding
Press Start fault finding. The session screen opens with the first symptom question.
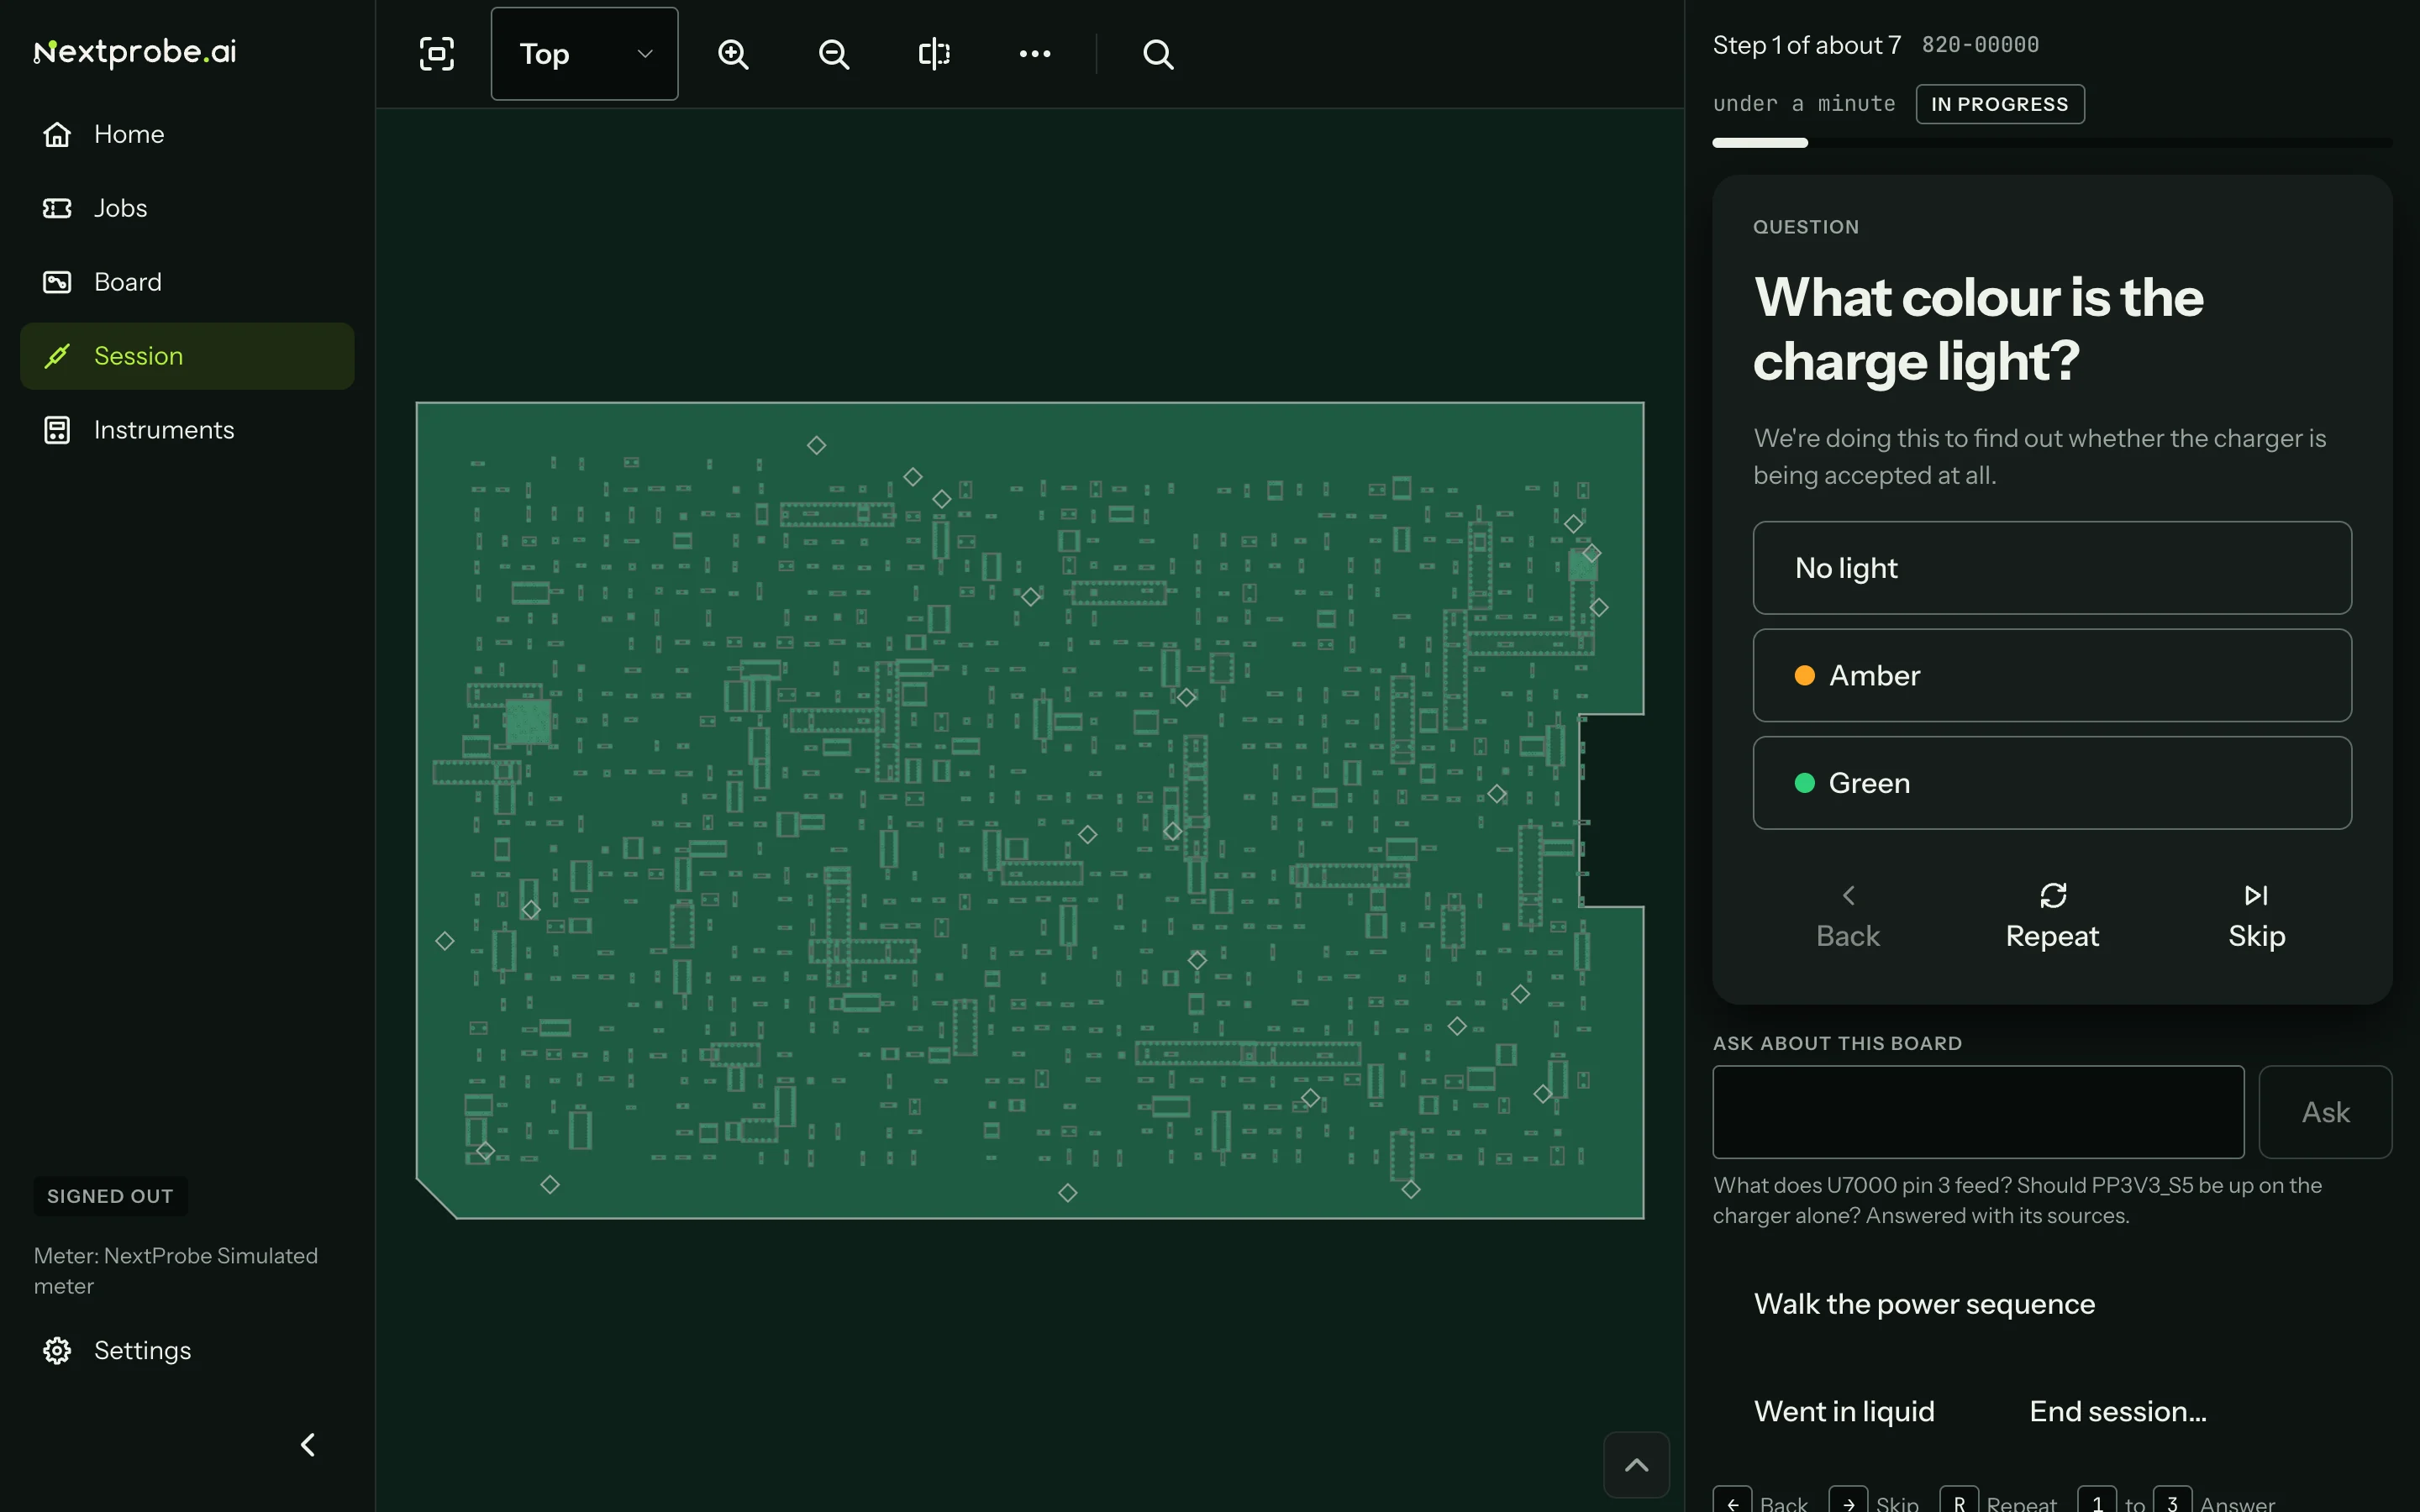
3. Answer the questions
Press No light, then 0.0 A for what the charger draws. Each answer sends the session down a different branch, and the progress line counts the steps ("Step 2 of about 7").
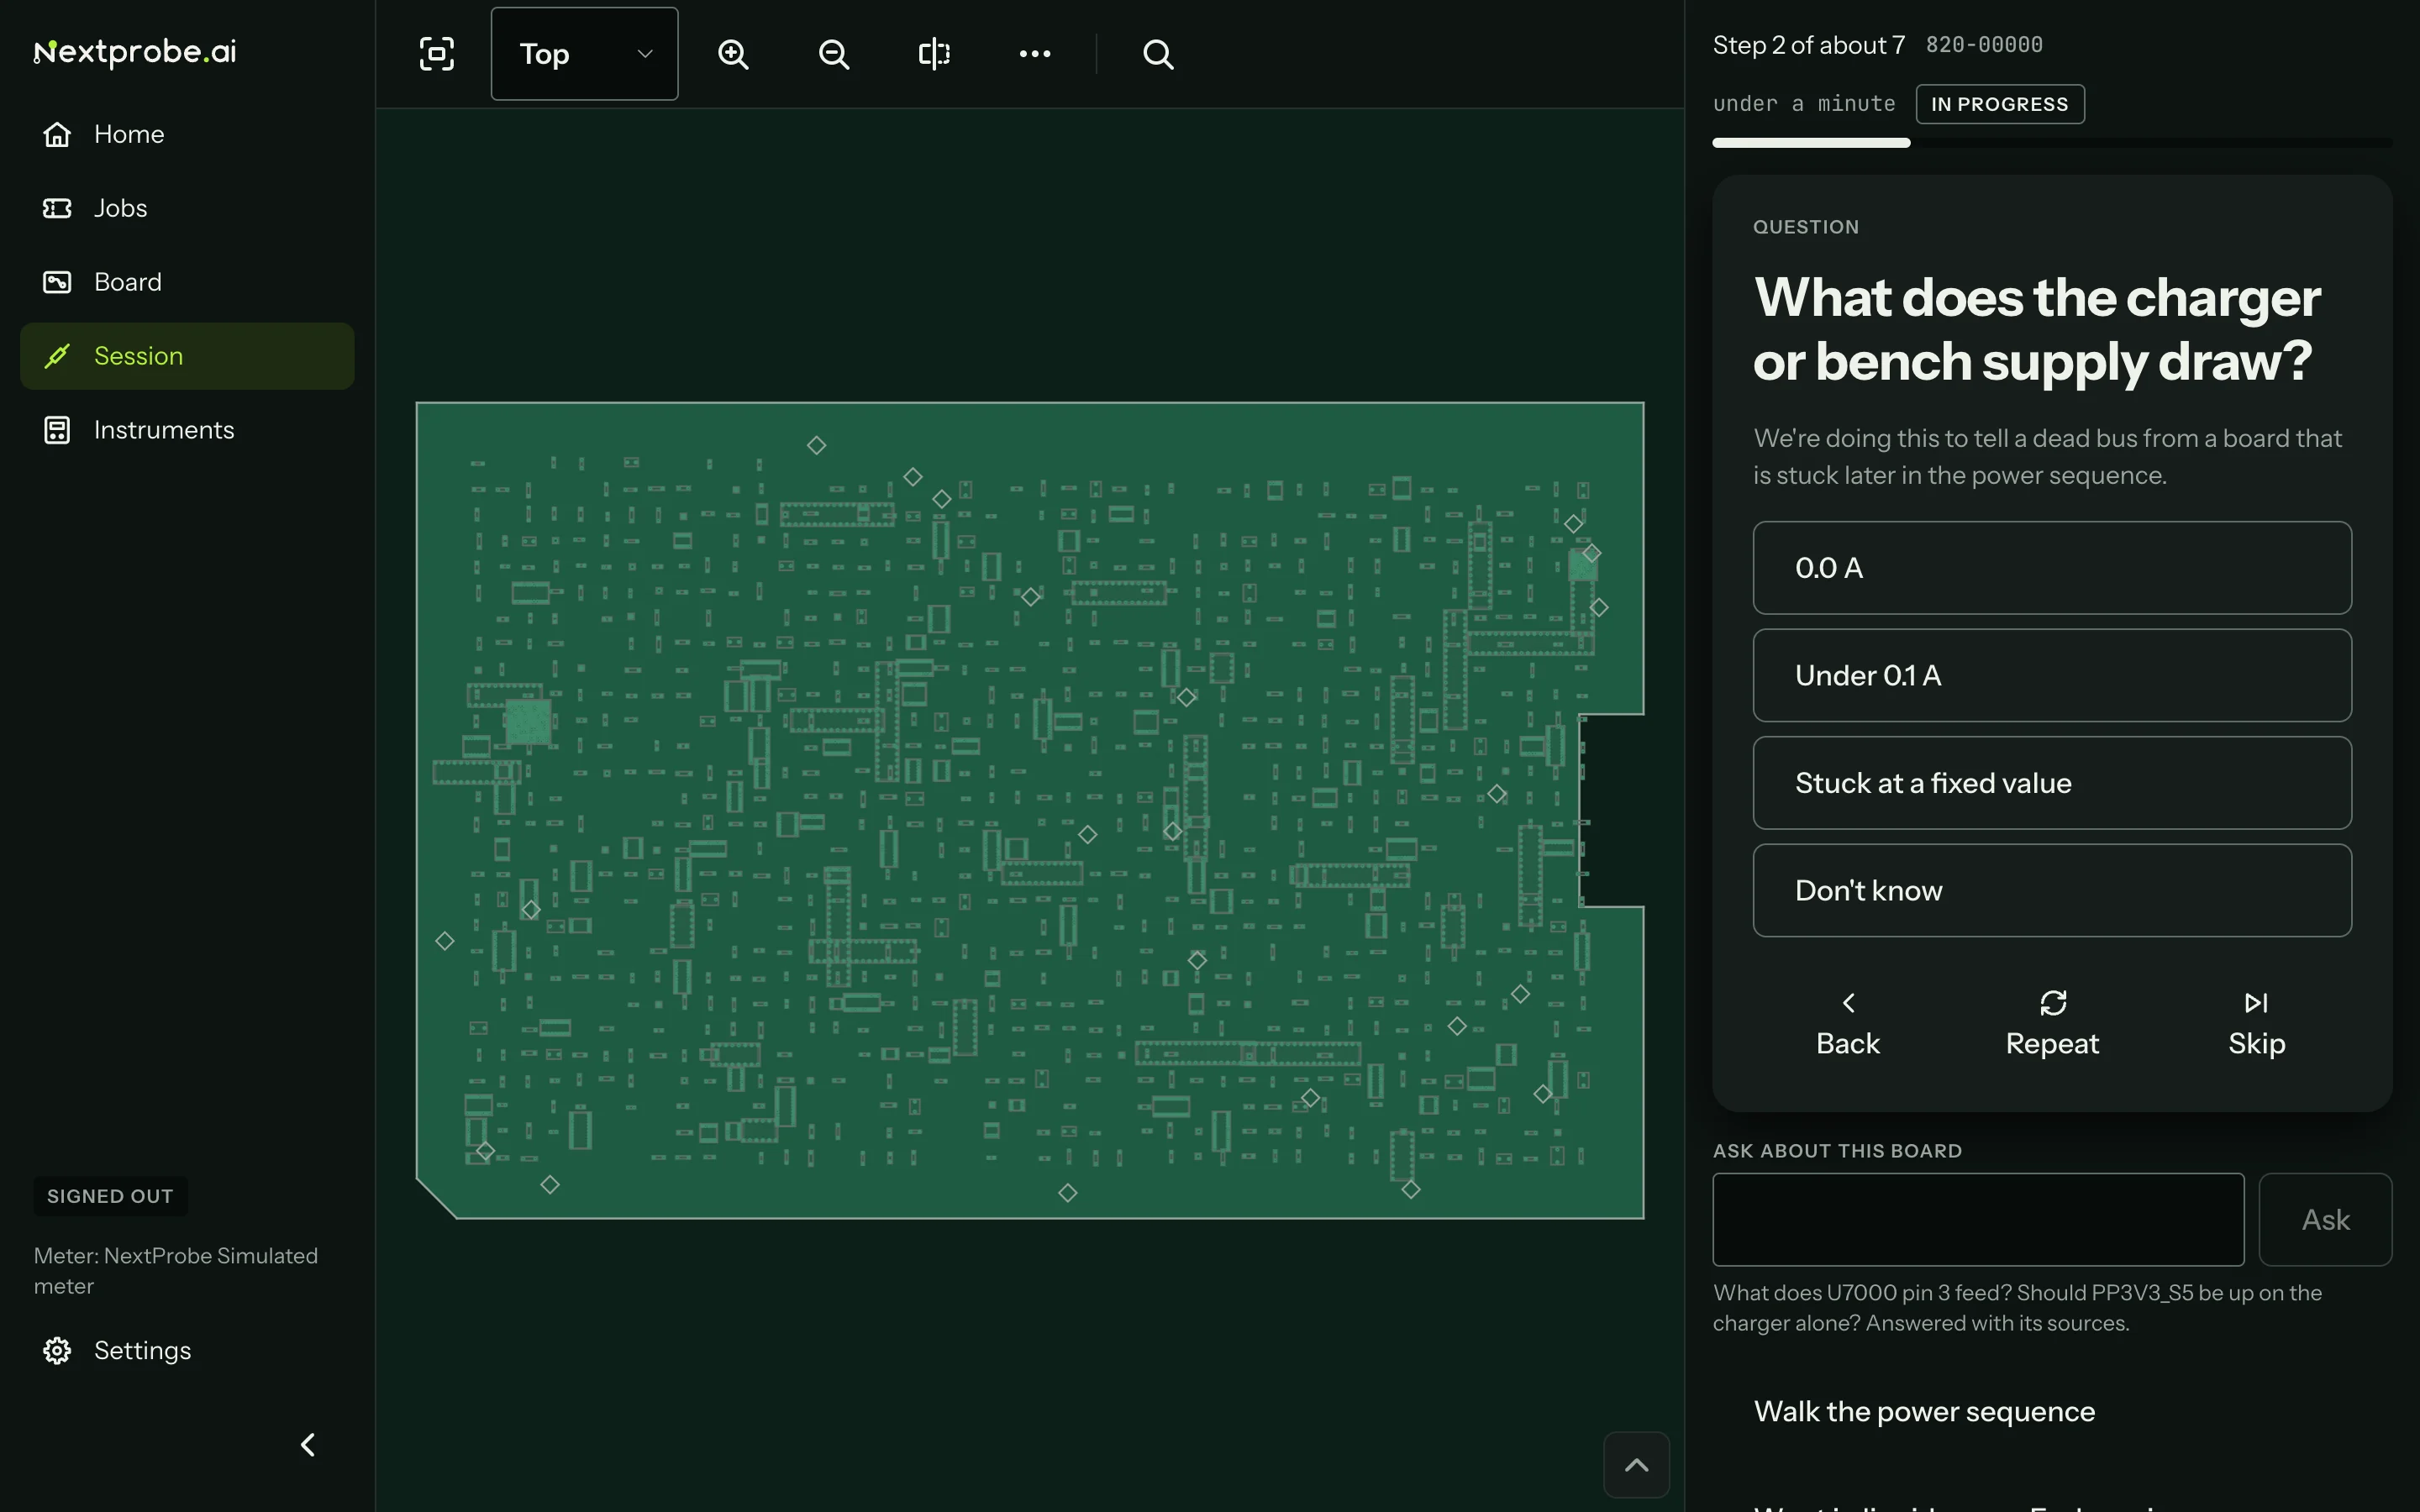
4. Prepare the board and confirm the power state
The next step asks you to unplug the charger and disconnect the battery. Its Before you probe panel names the power state the next readings need. Press Confirm: Unplugged, battery disconnected, then Done.
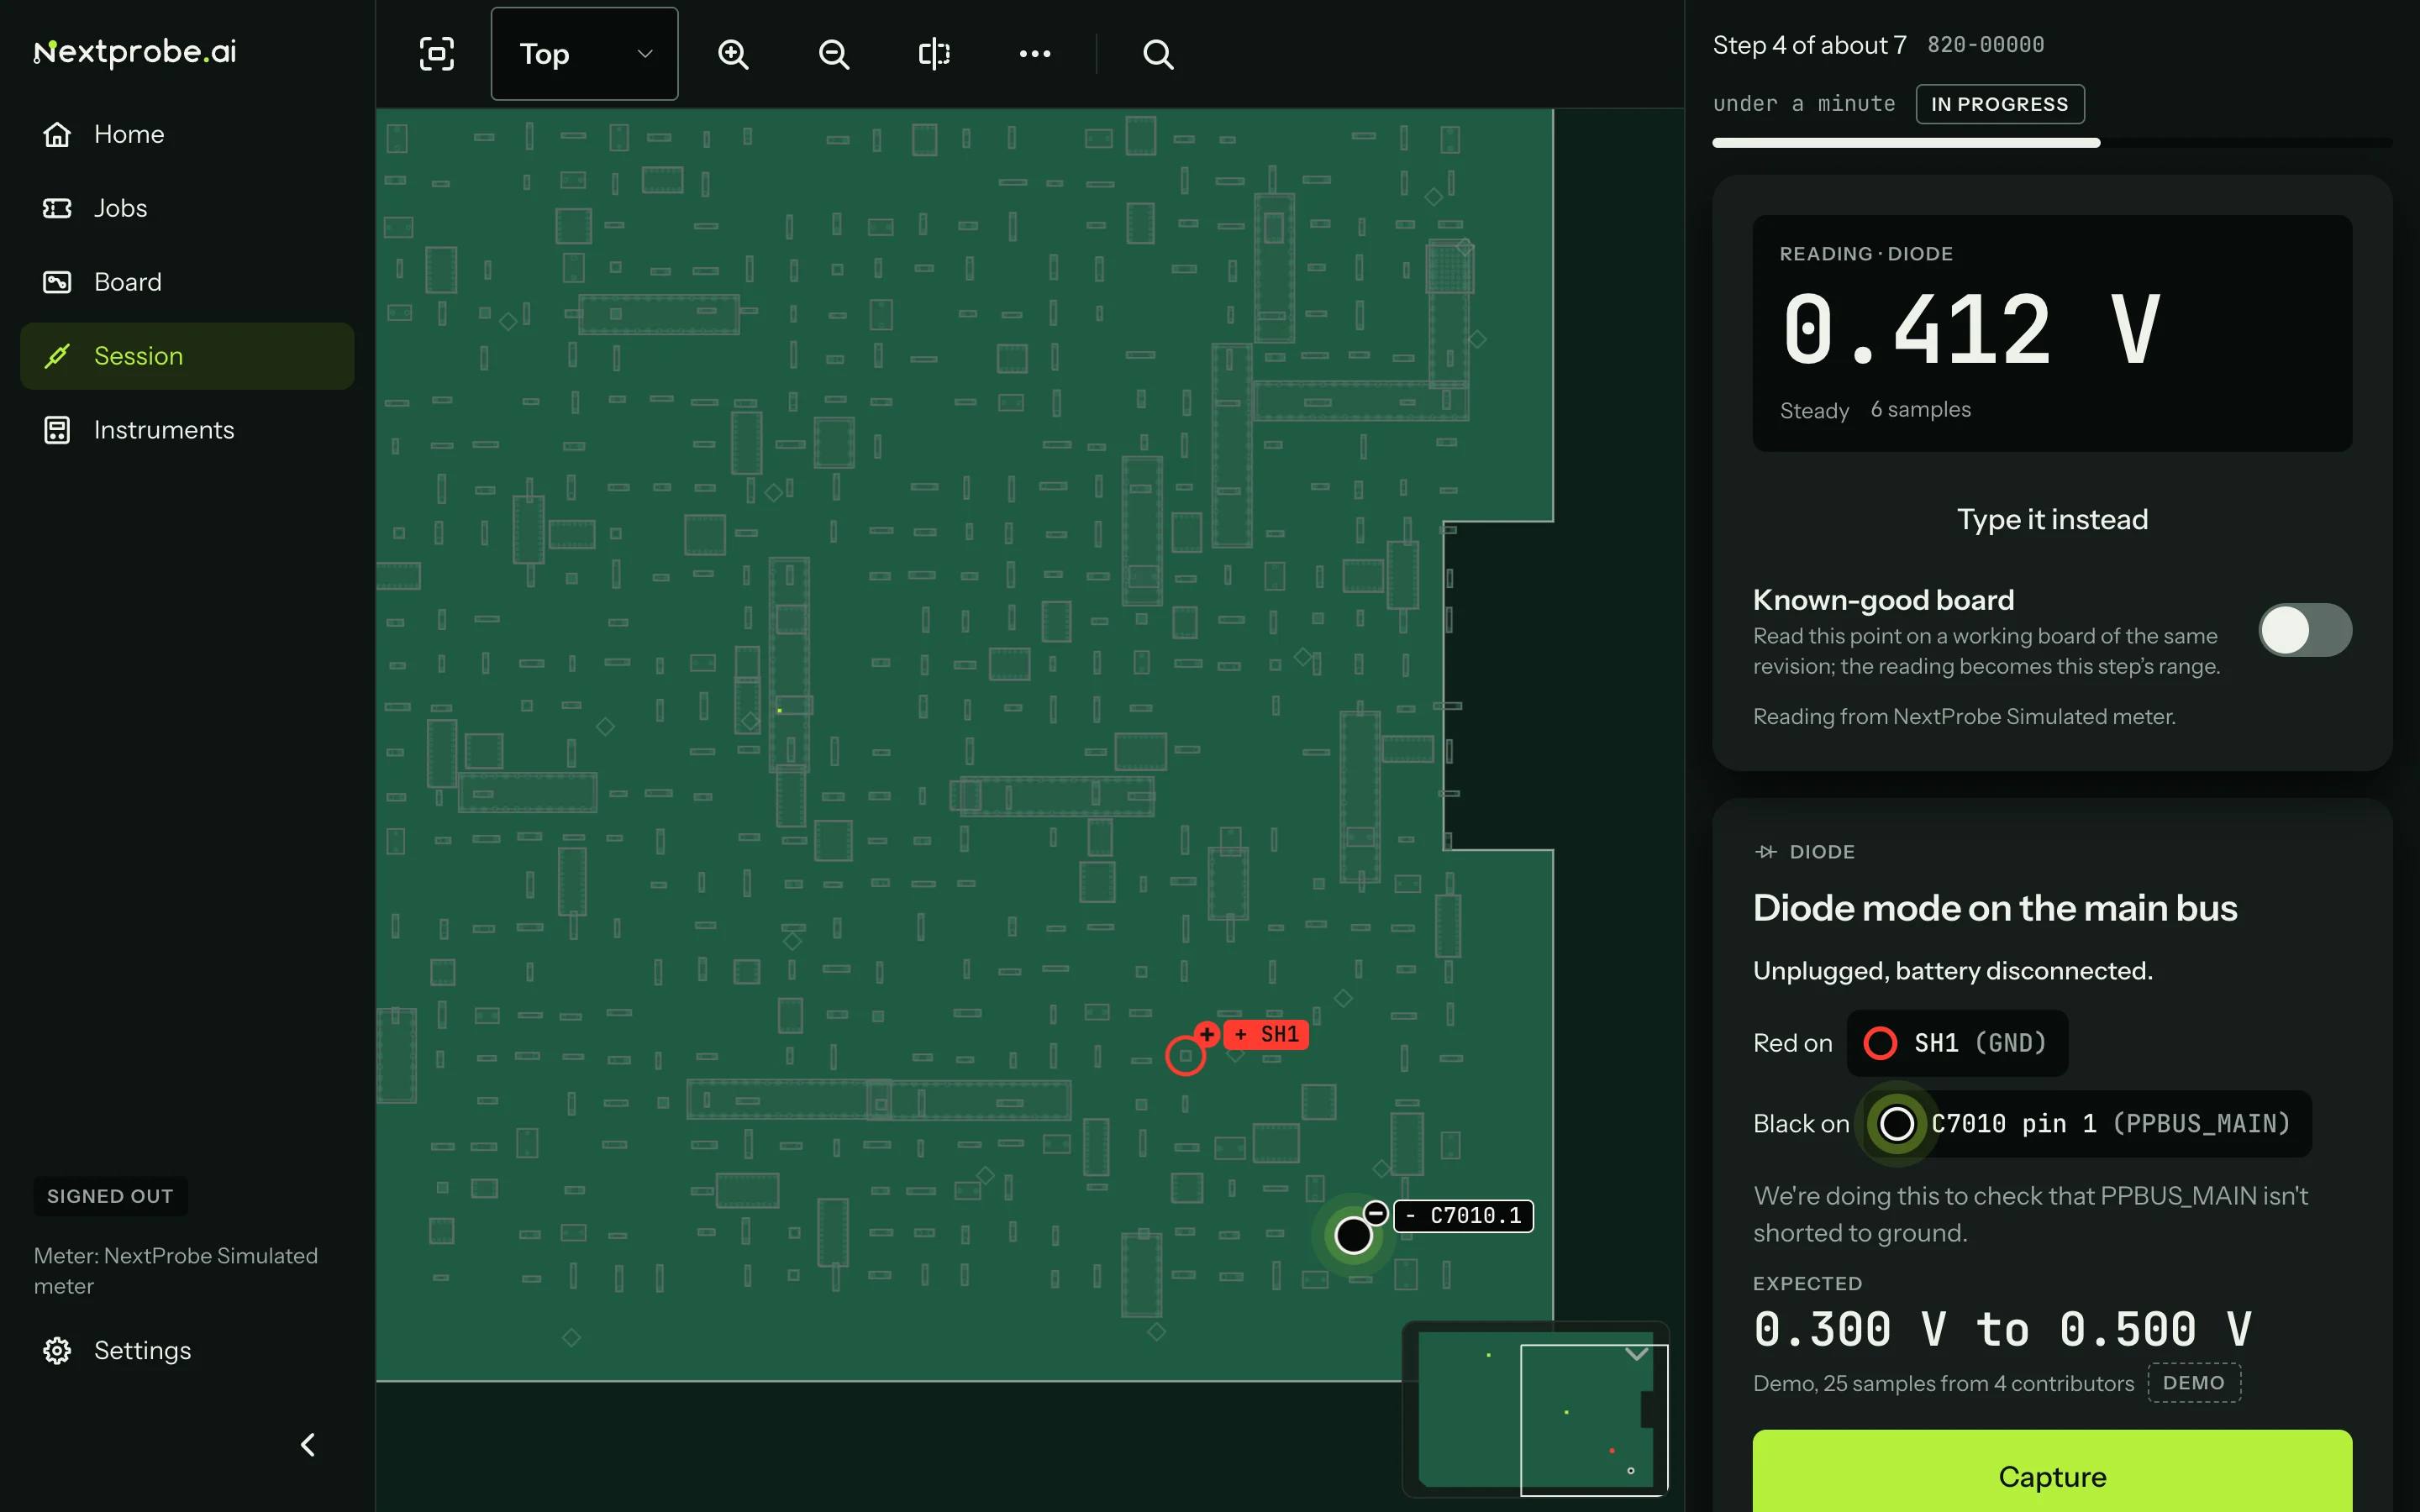
5. Take the first reading
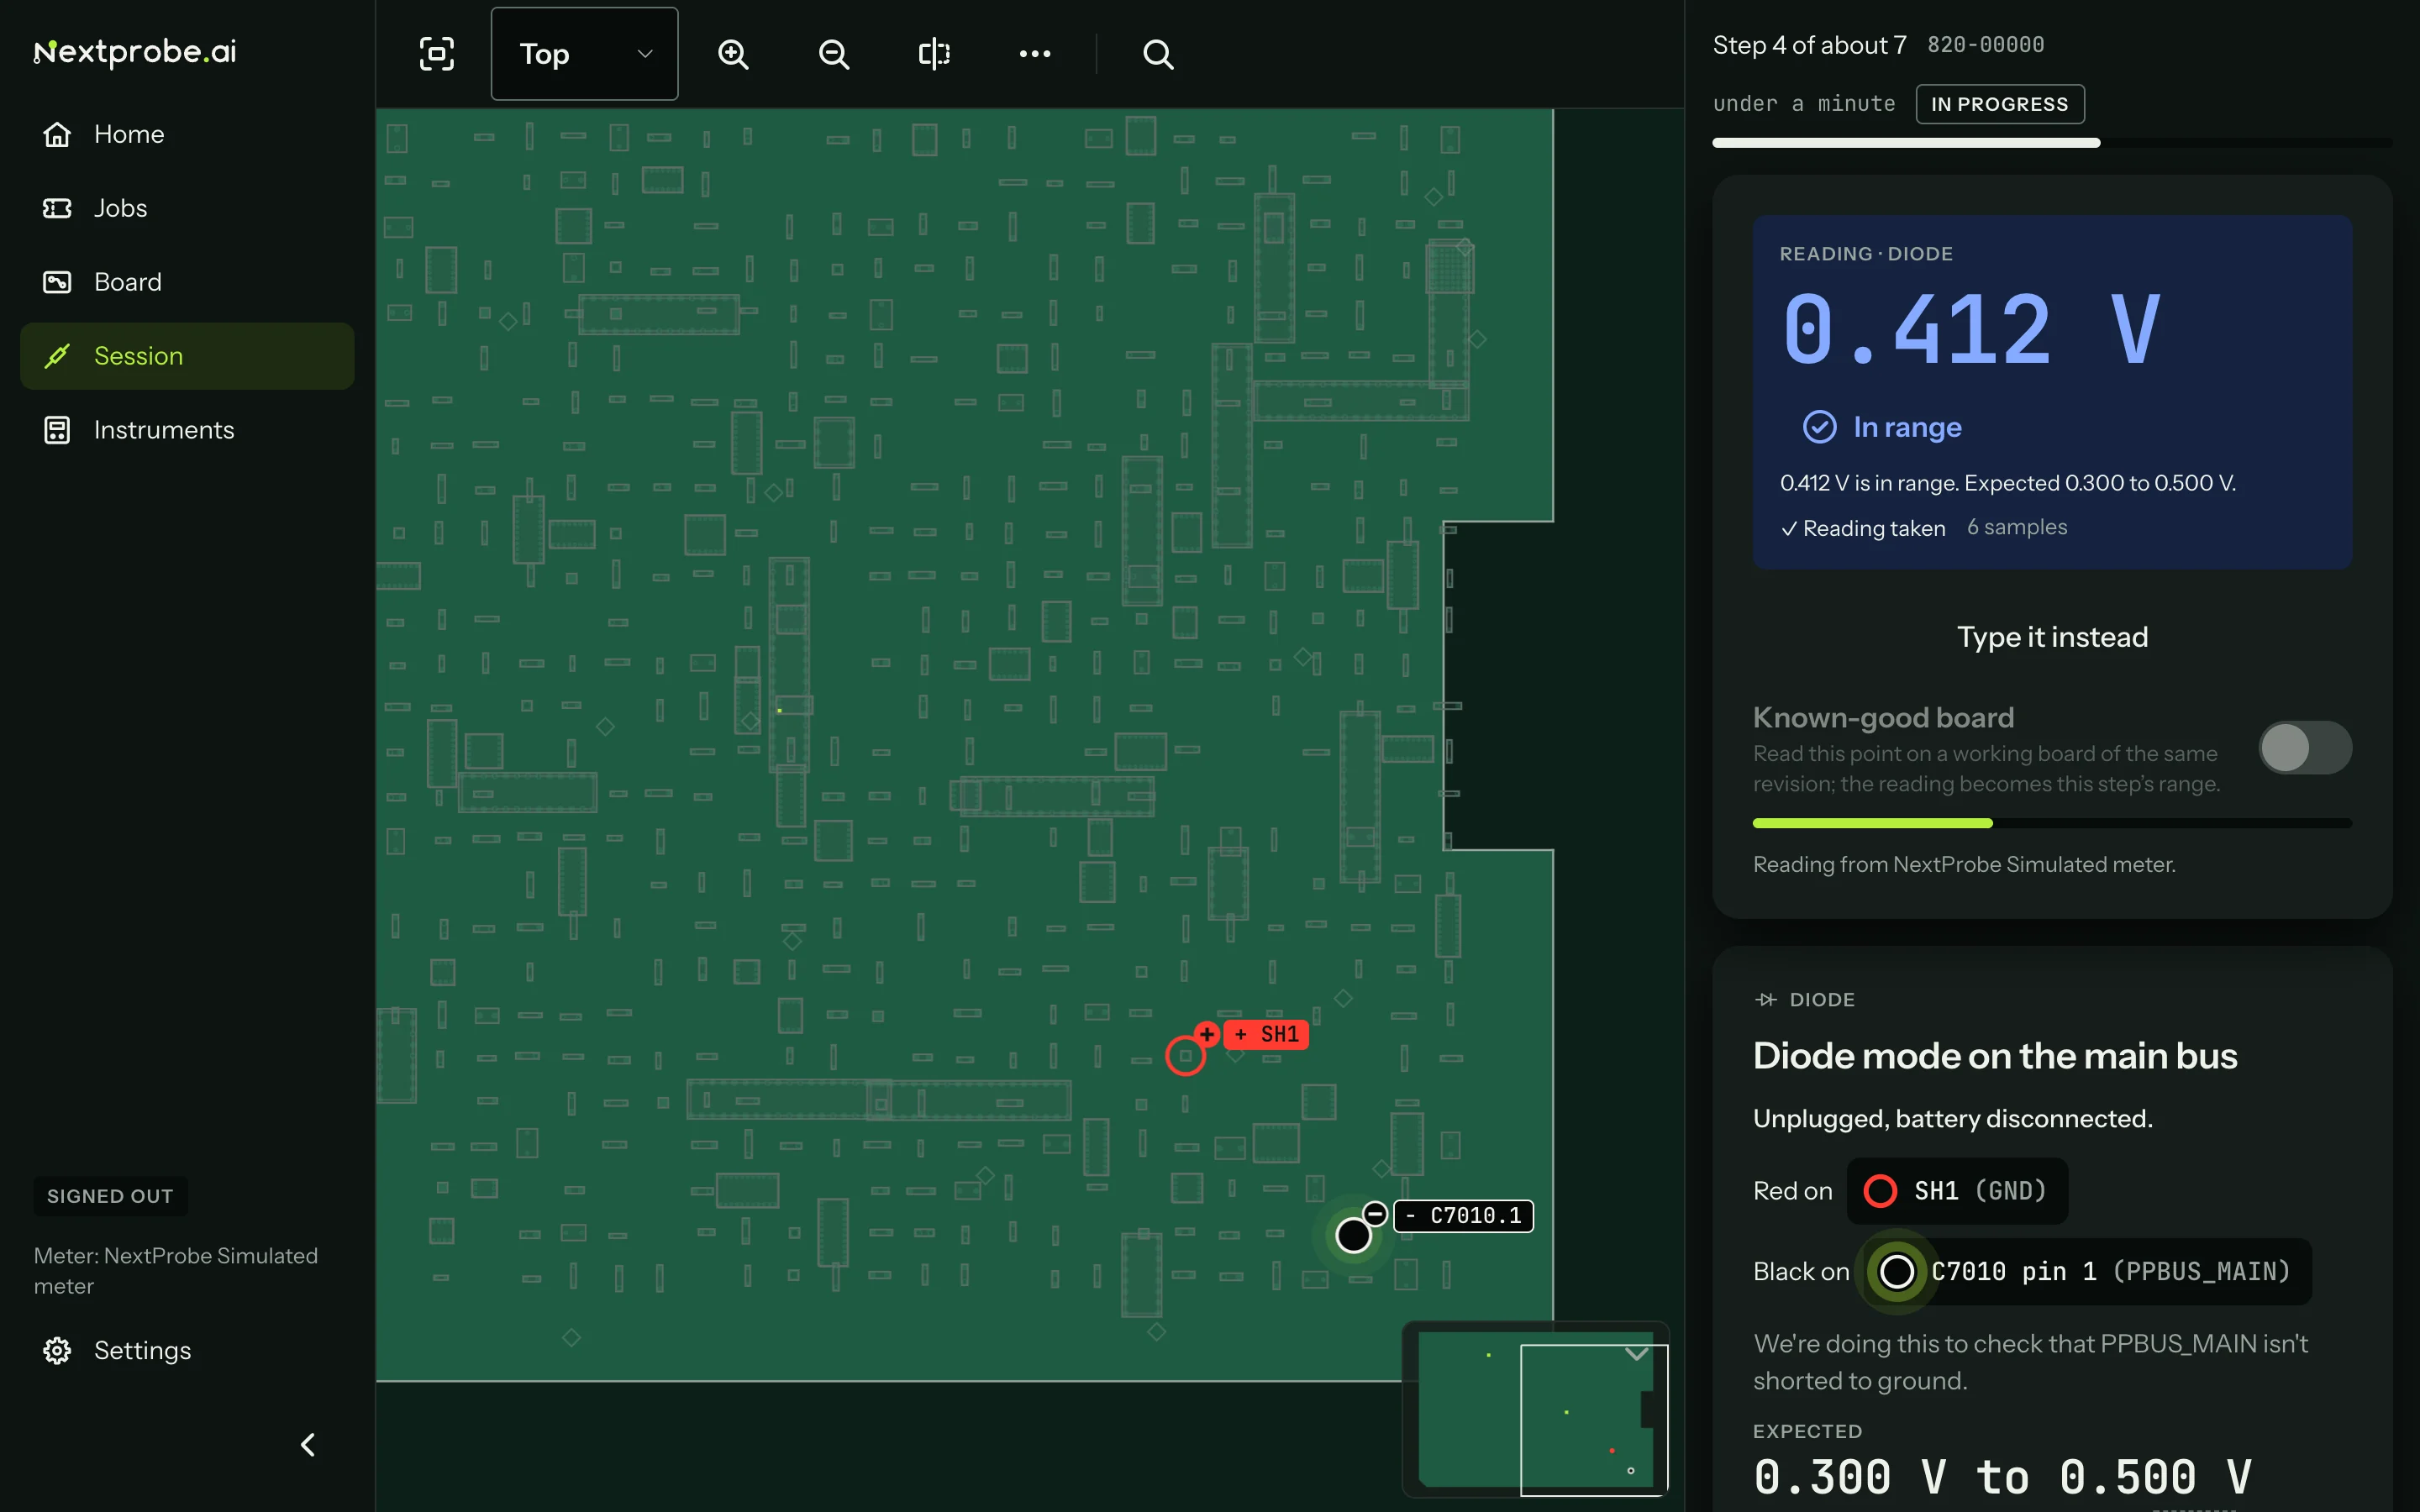
The first measure step is diode mode on the main bus: red on SH1 (ground), black on C7010 pin 1. The simulated meter reads 0.412 V, the bar fills while it holds steady, and the reading is taken.
Two beeps mean the reading is saved. The verdict appears, In range, and the next step loads two seconds later.
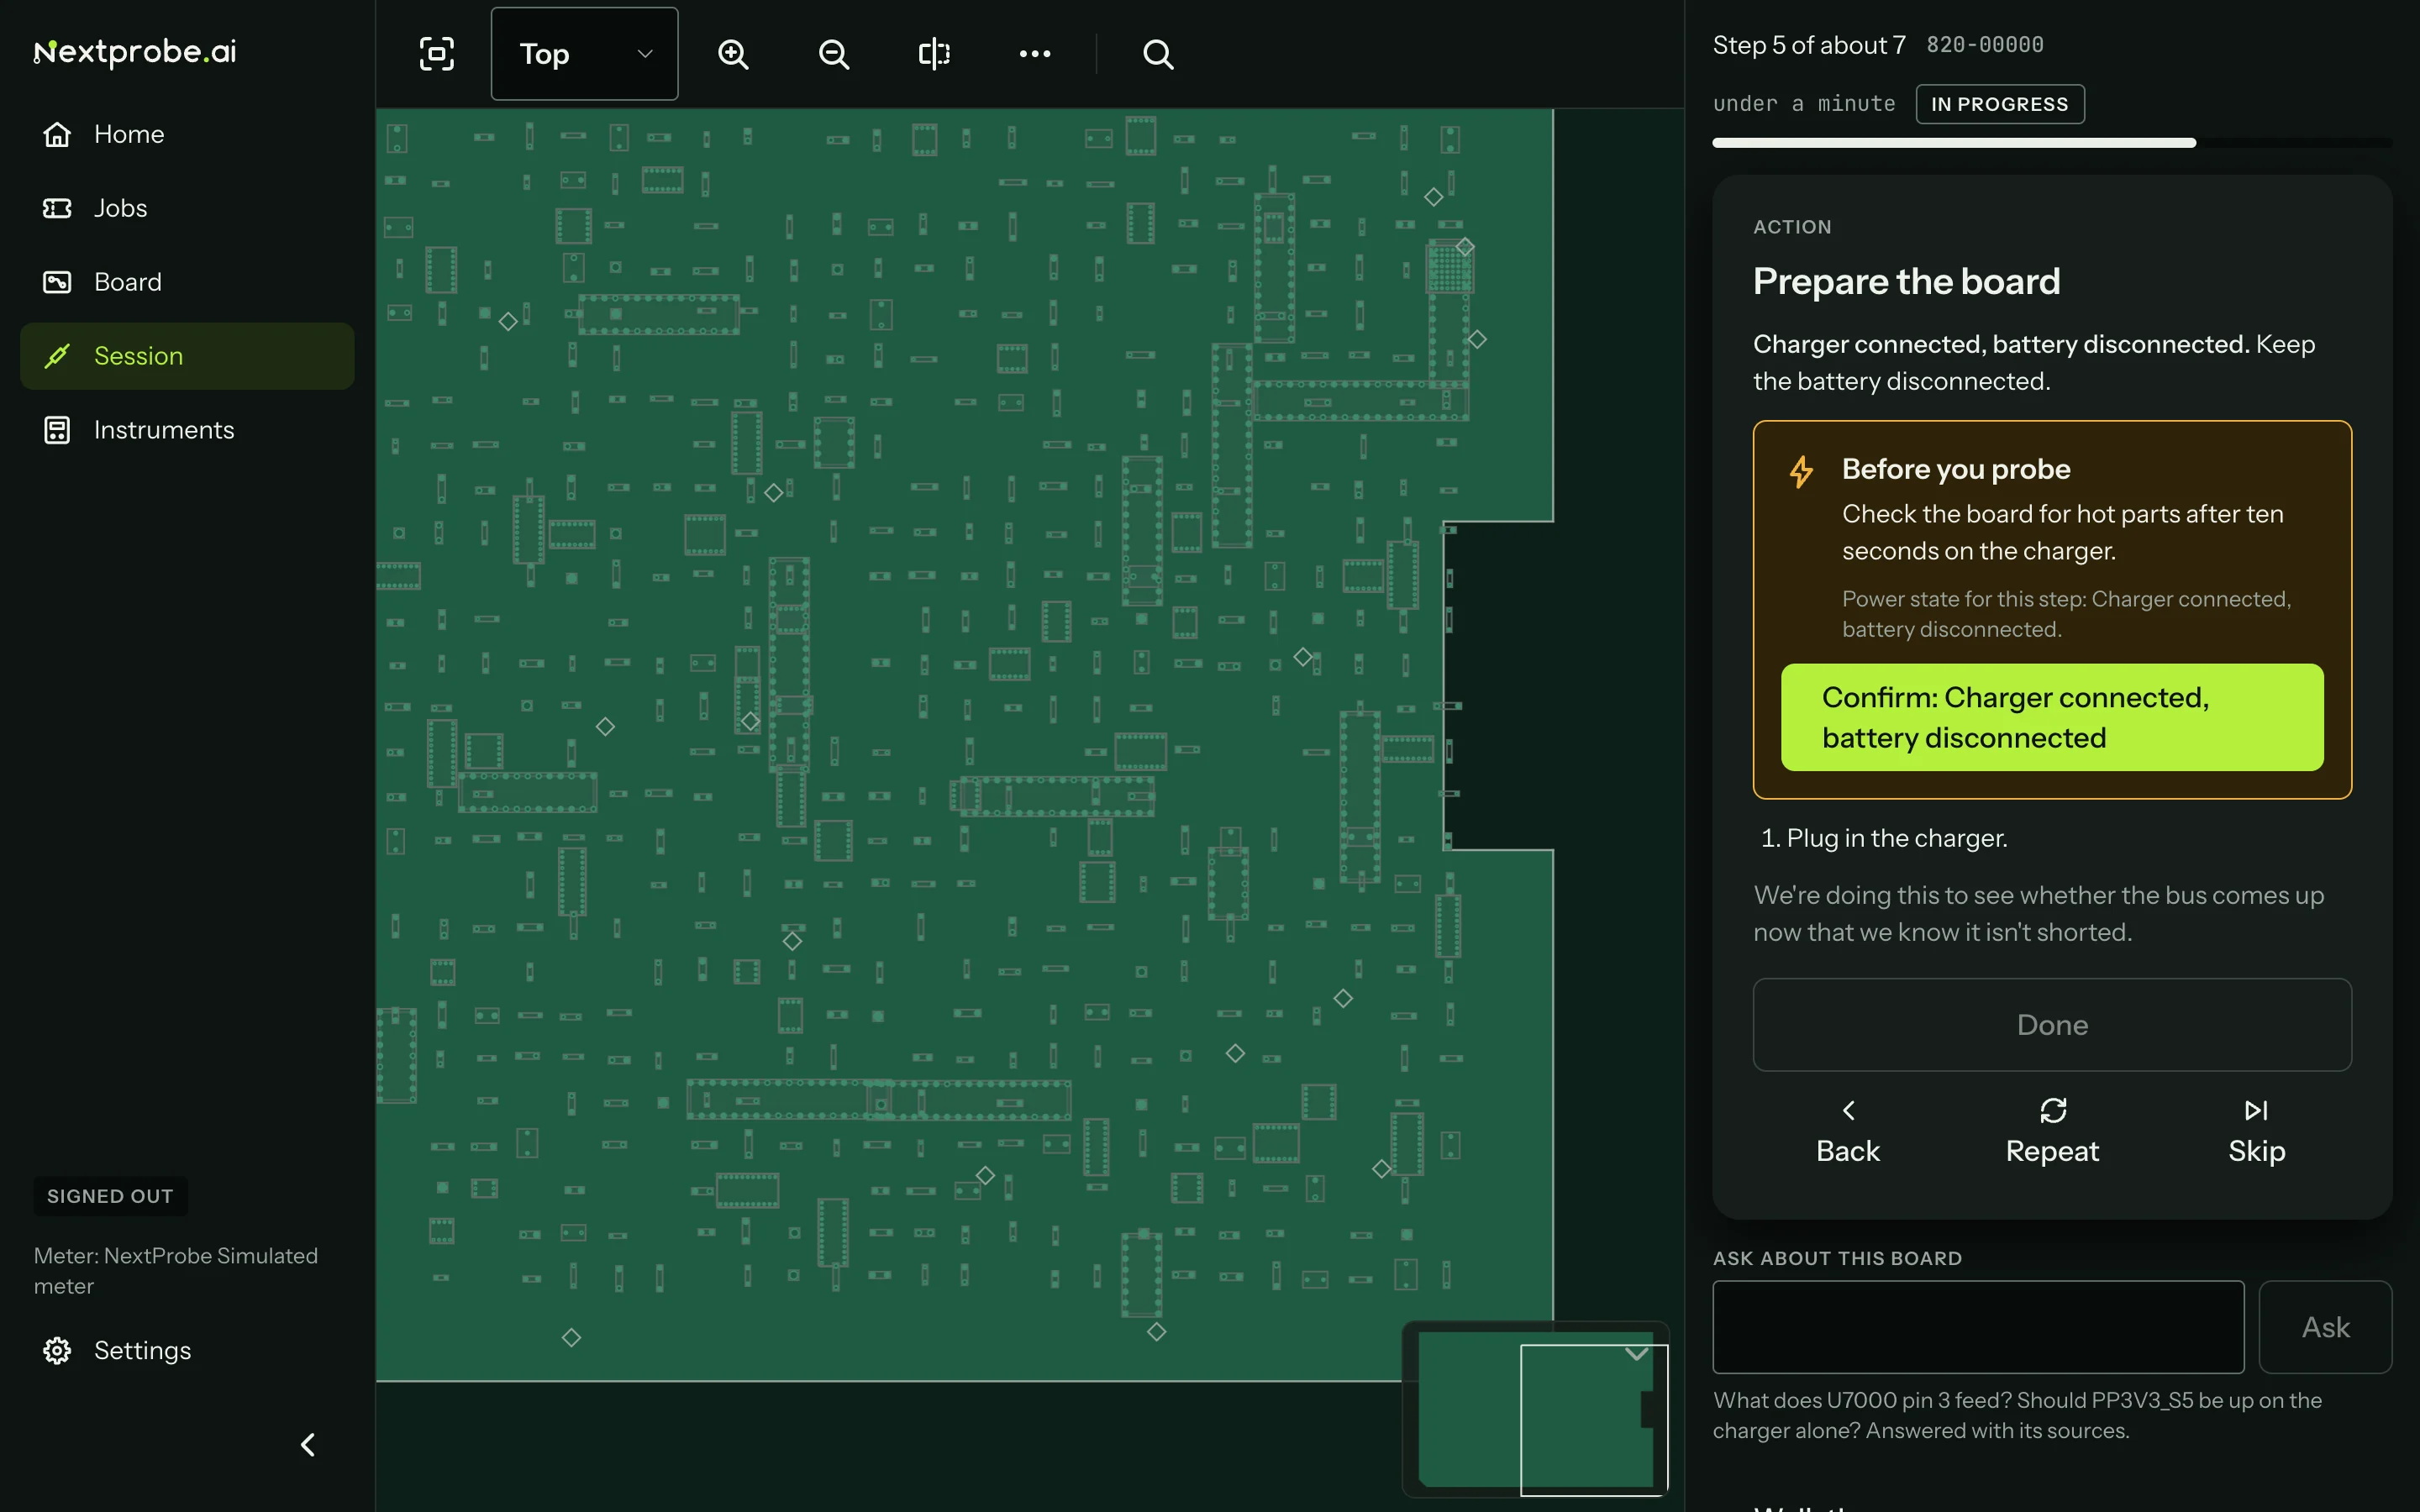
6. Plug the charger in
The bus isn't shorted, so the session asks you to plug the charger in and keep the battery out. Confirm the power state again and press Done.
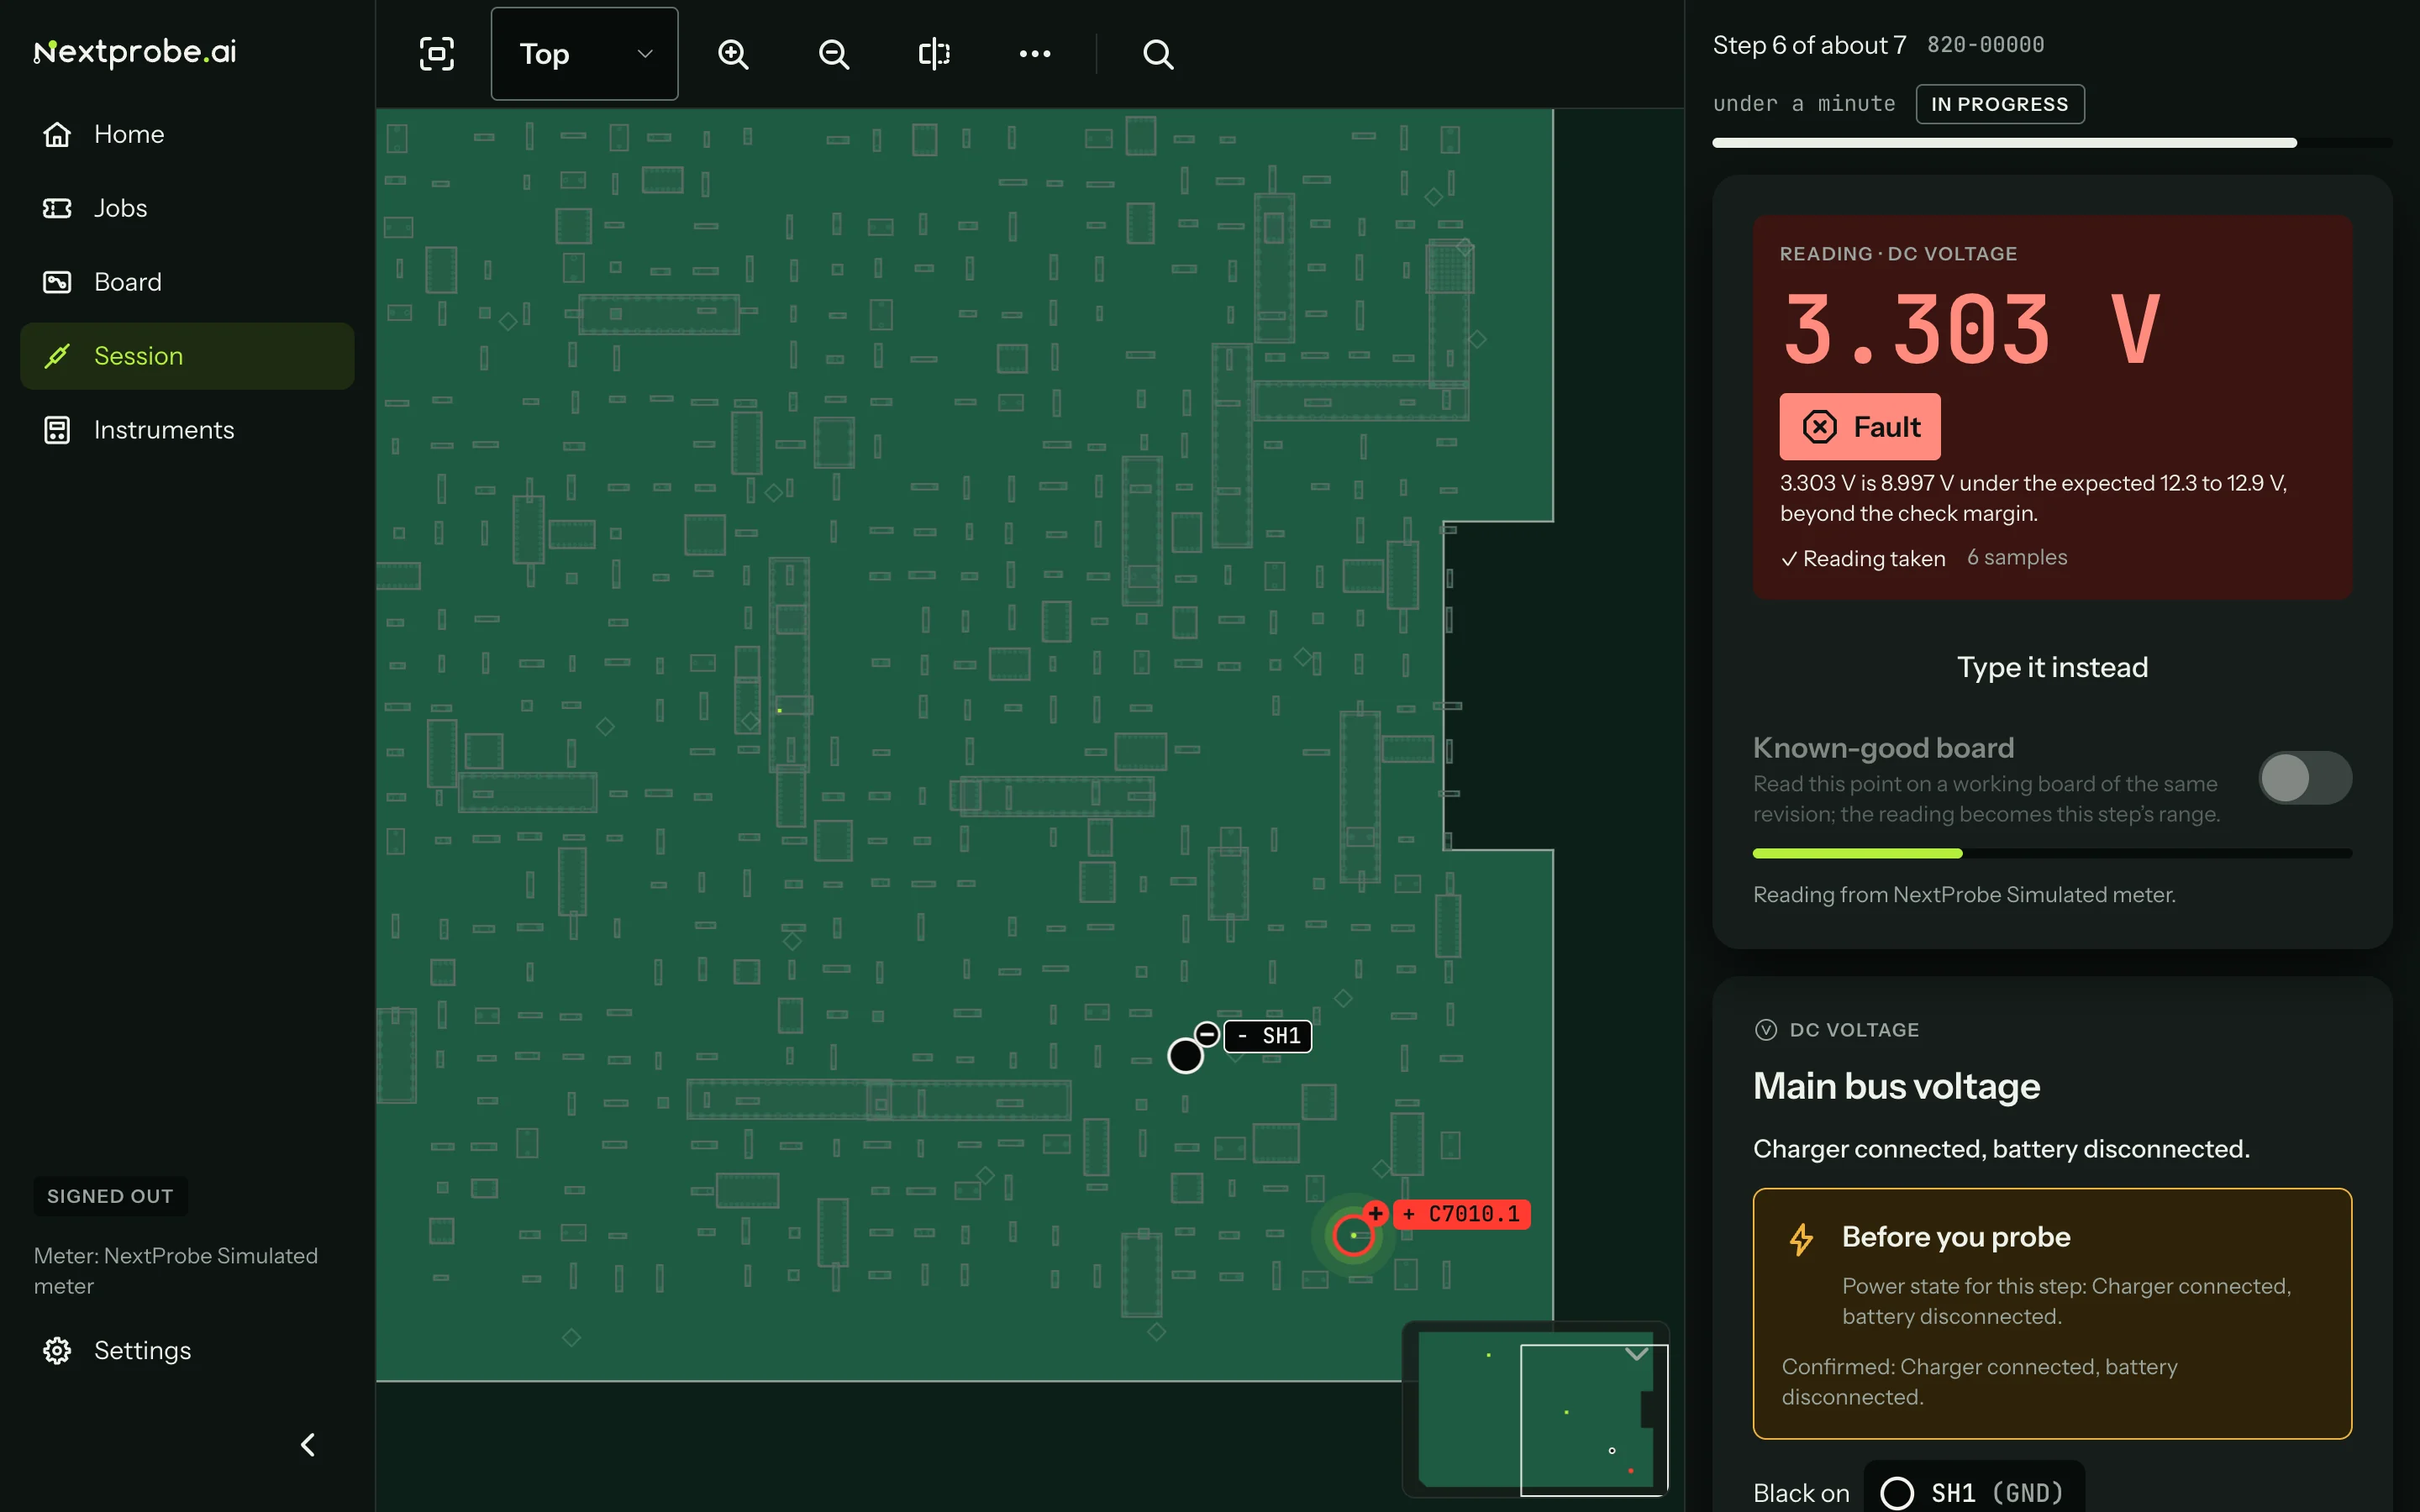
7. Measure the bus voltage
Black on ground, red on C7010 pin 1, DC voltage. The bus should be about 12.6 V. The simulated meter reads about 3.3 V, so the verdict is Fault, with the reason in numbers.
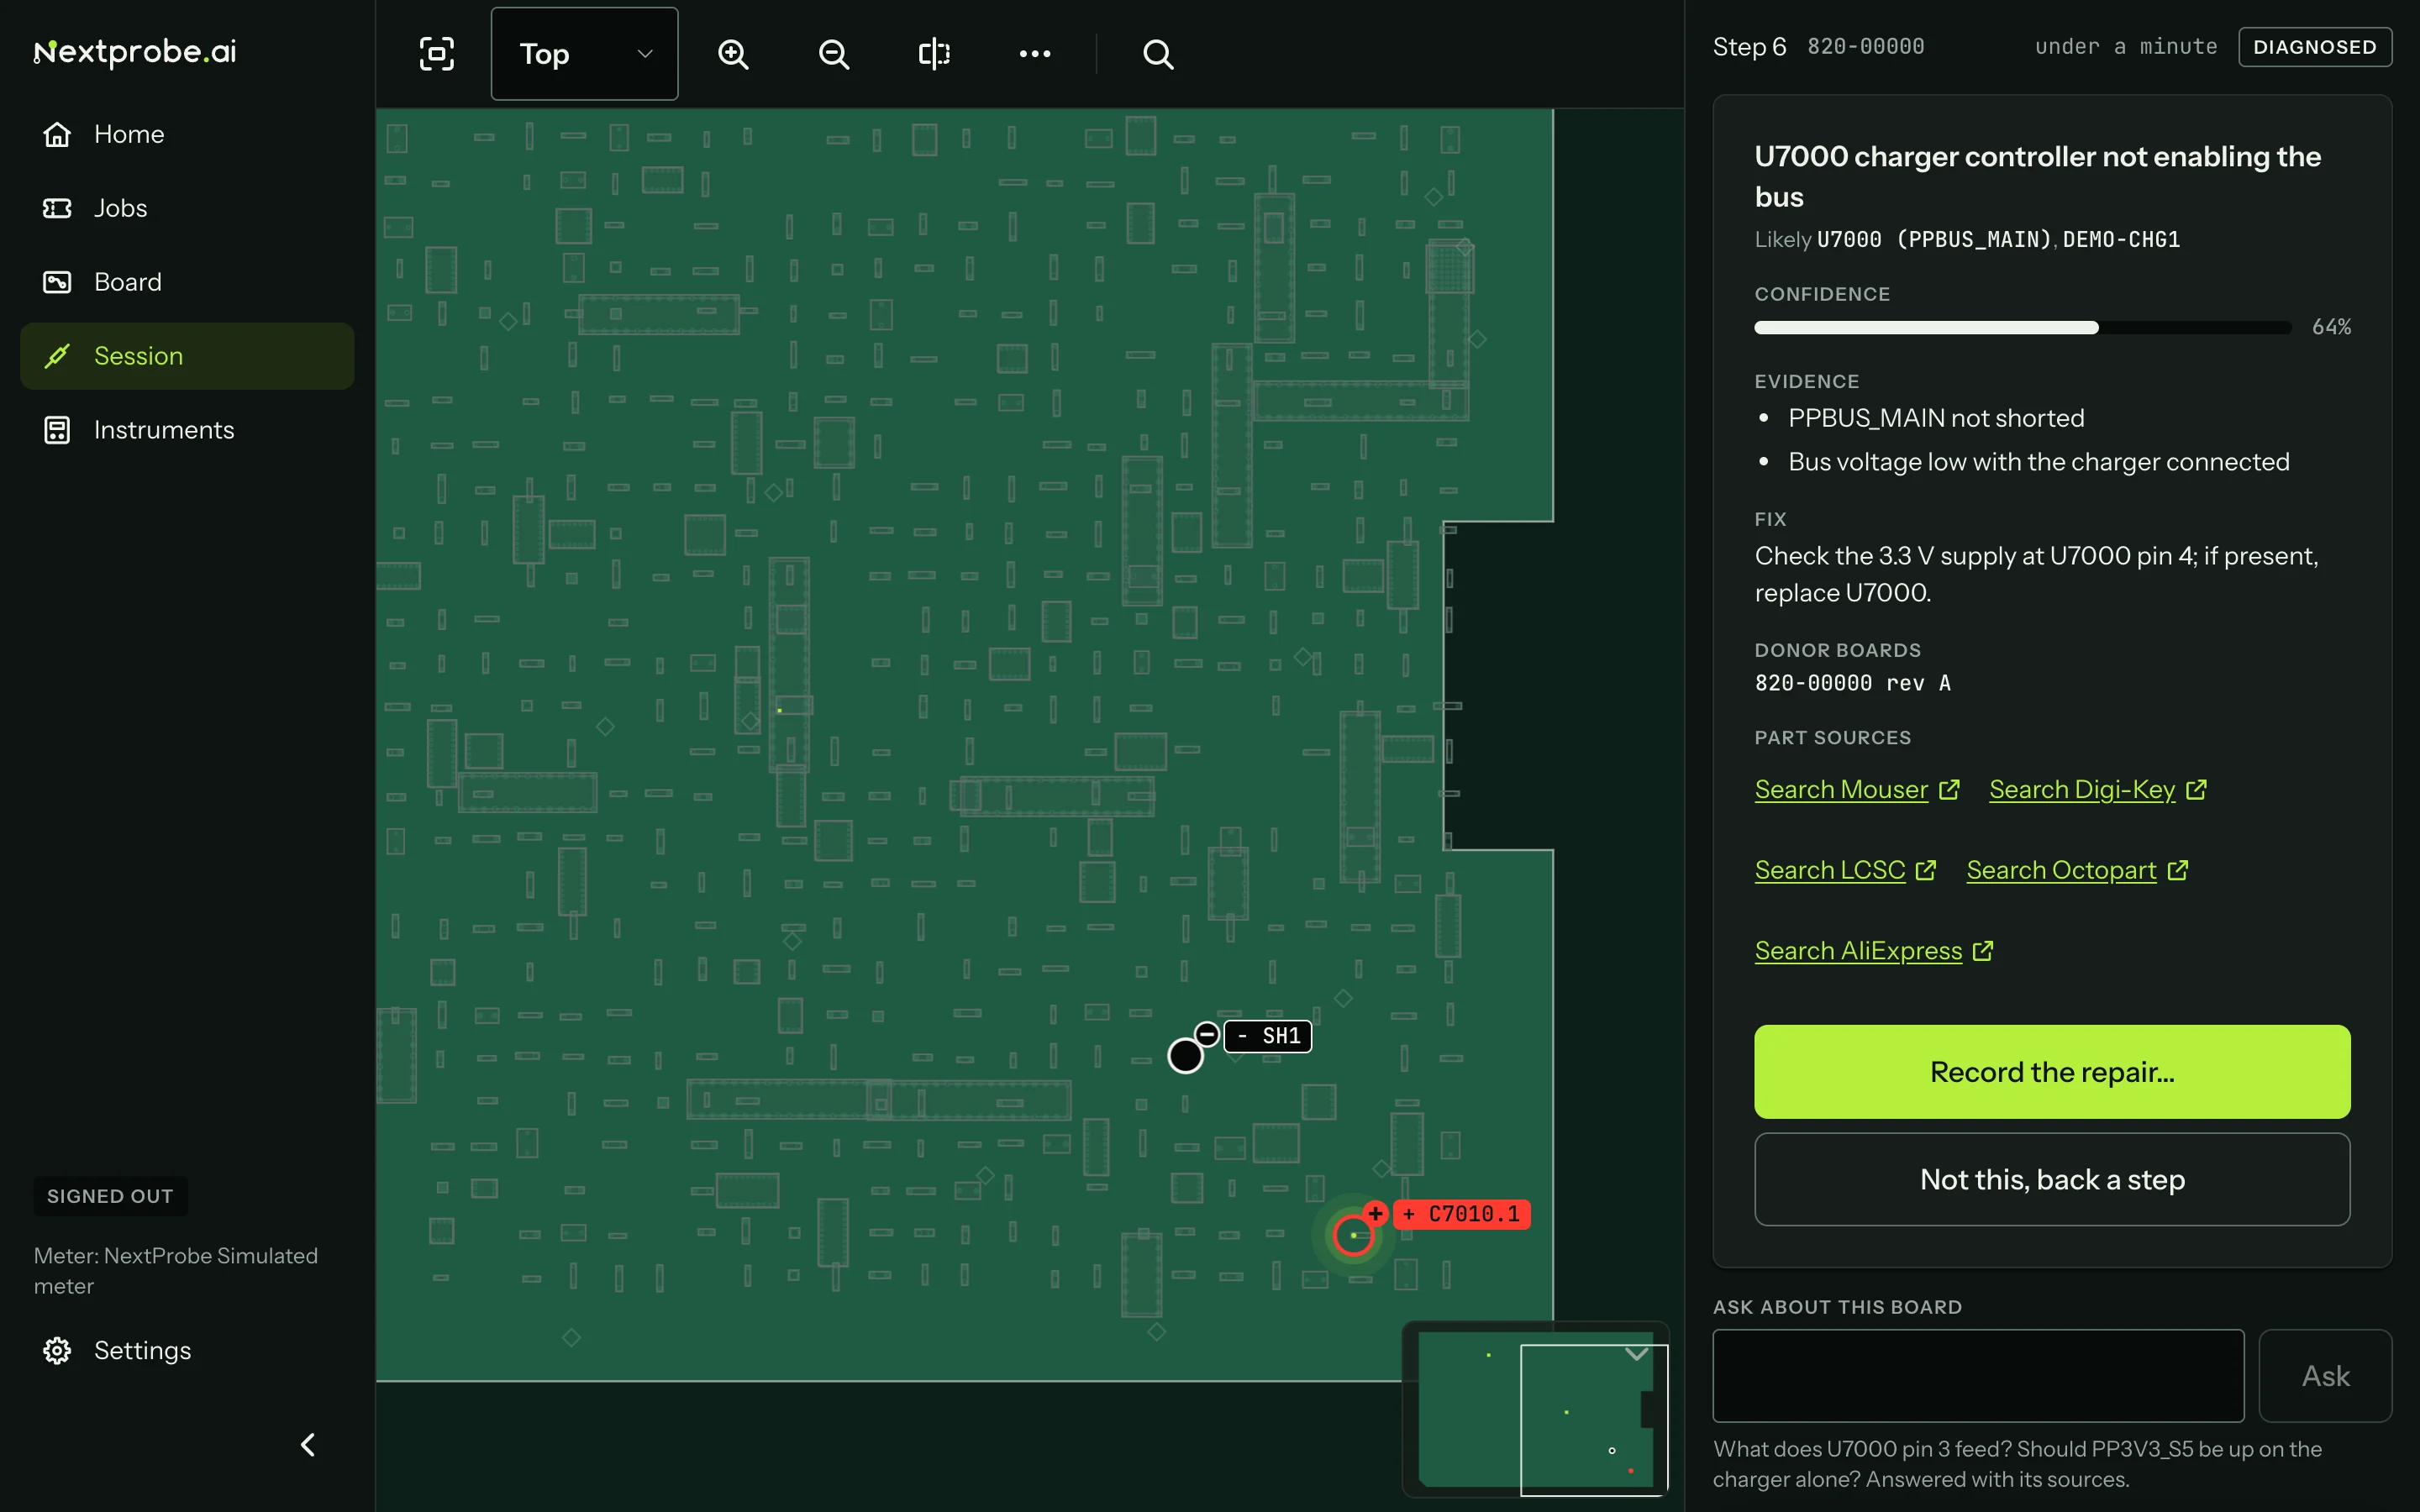
8. Read the diagnosis
The readings point at U7000, the charger controller. The diagnosis card shows how sure NextProbe is, the evidence, the fix, donor boards and supplier searches for the part.
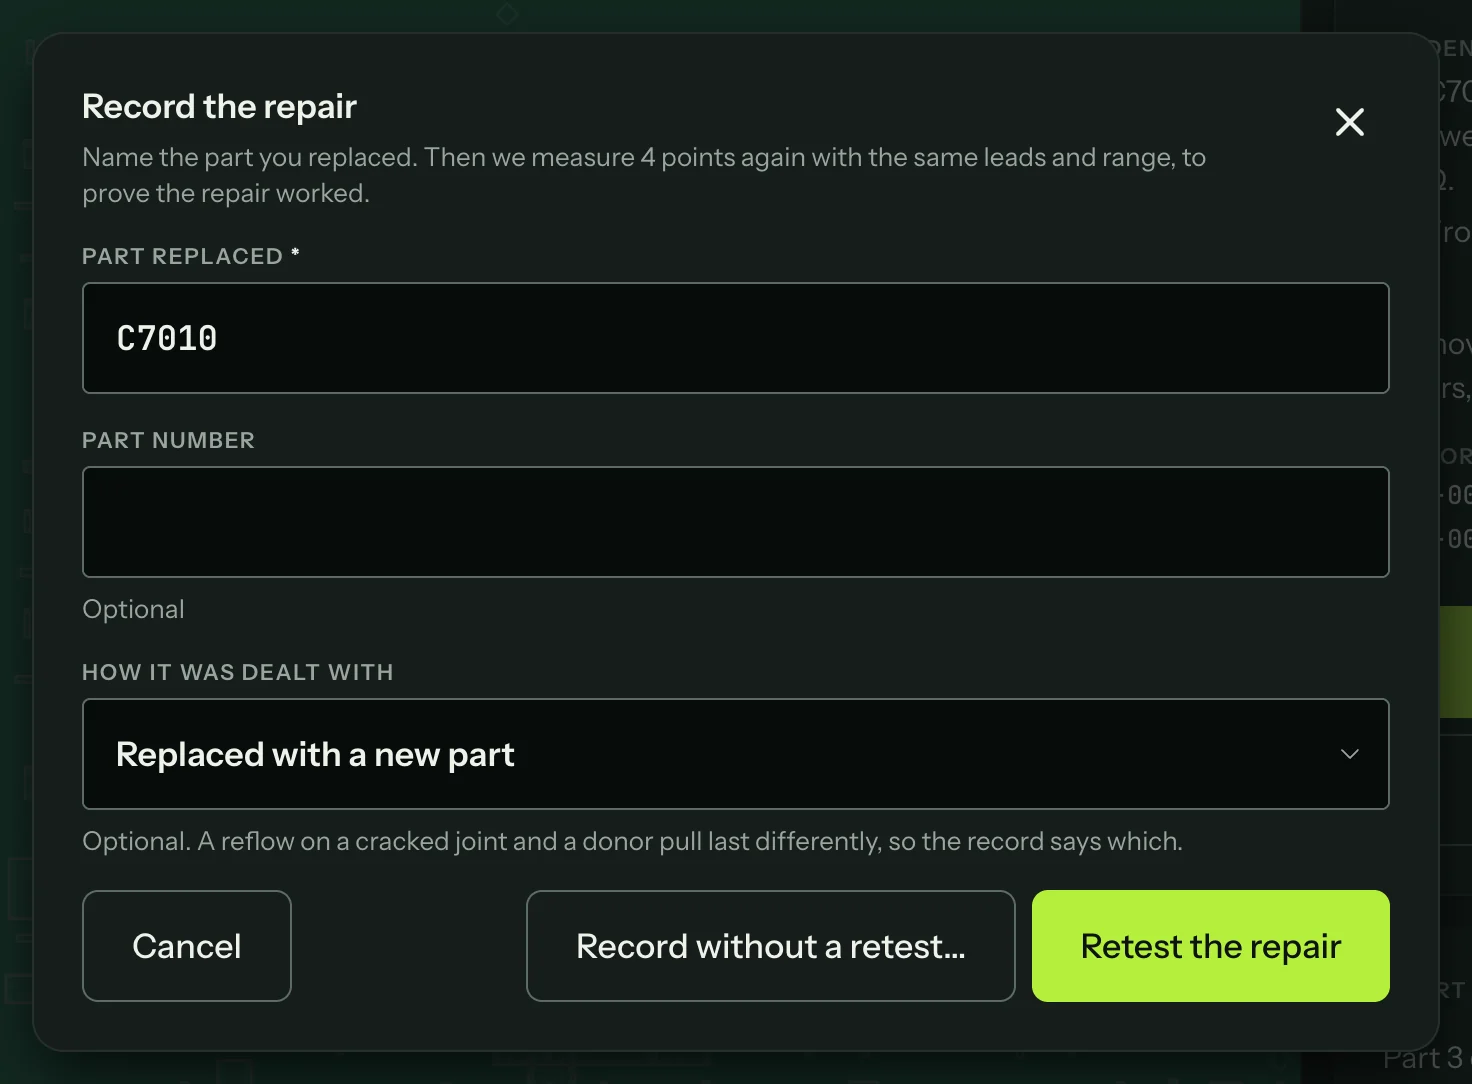
9. Record the repair and retest it
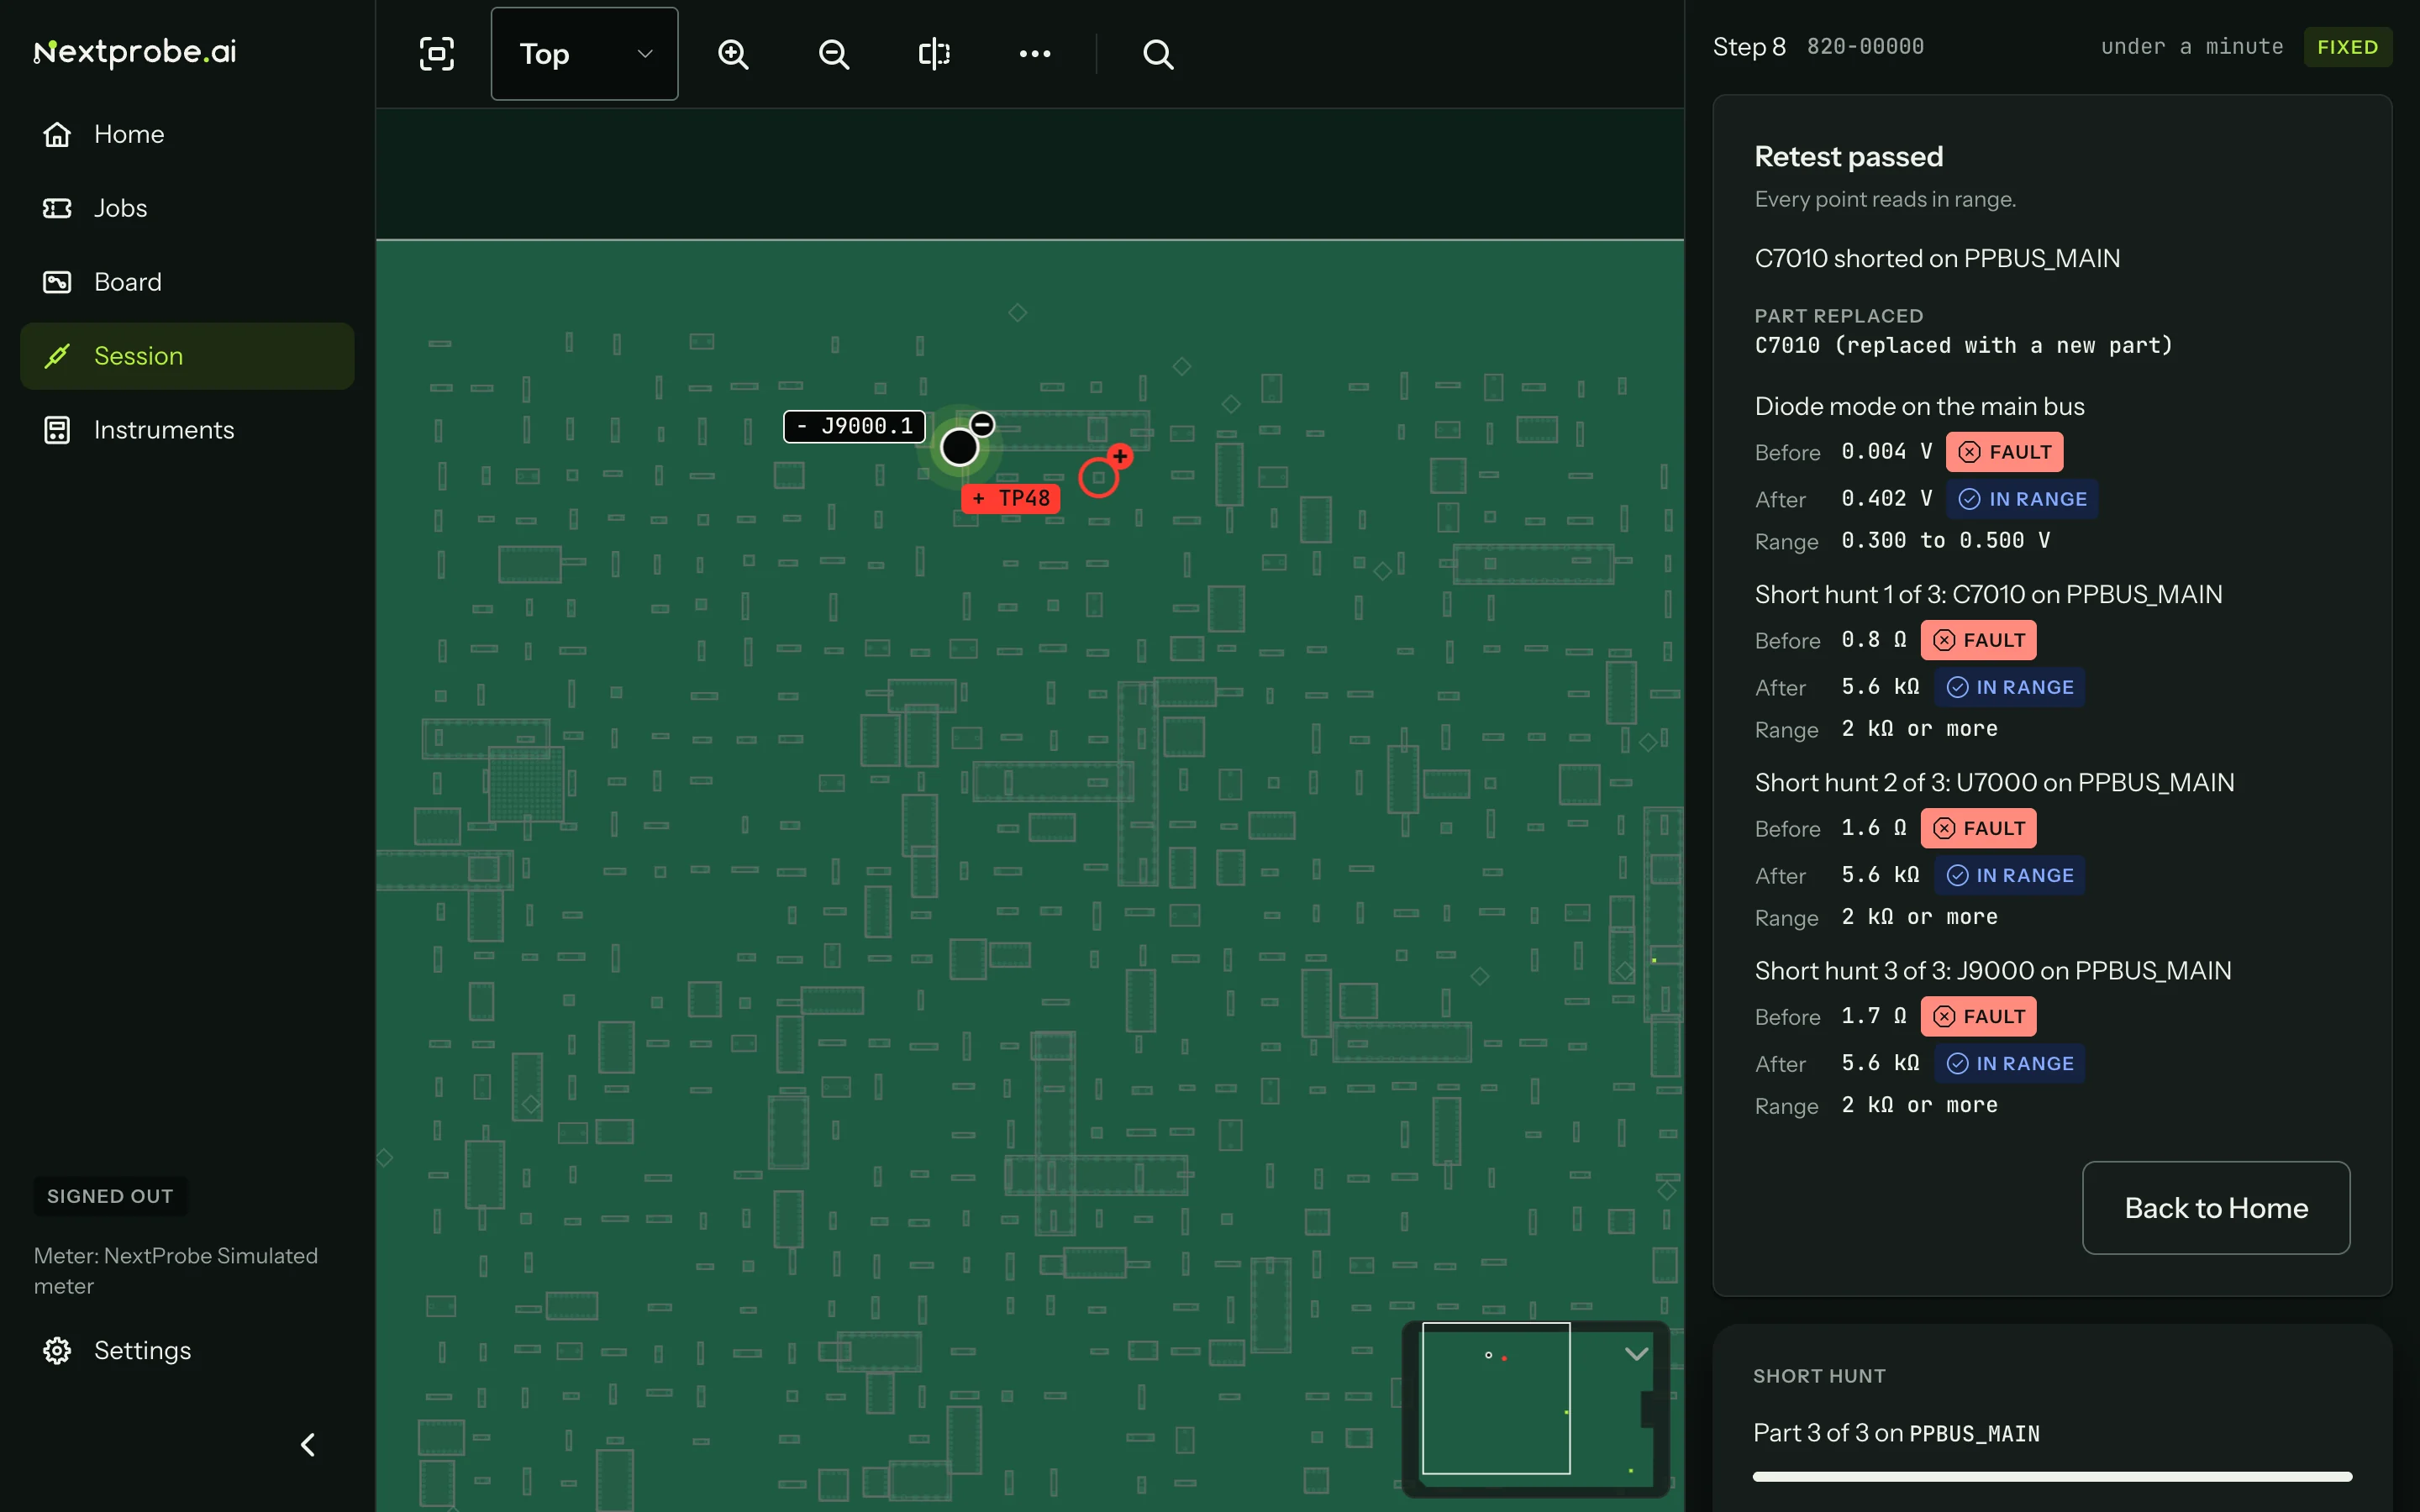
Press Record the repair…, check the part, choose how it was dealt with, and press Retest the repair. The retest measures the bus again with the same leads and range. Type 12.6 (press Type it instead, because the simulated meter still reads 3.3 V) and the retest passes.
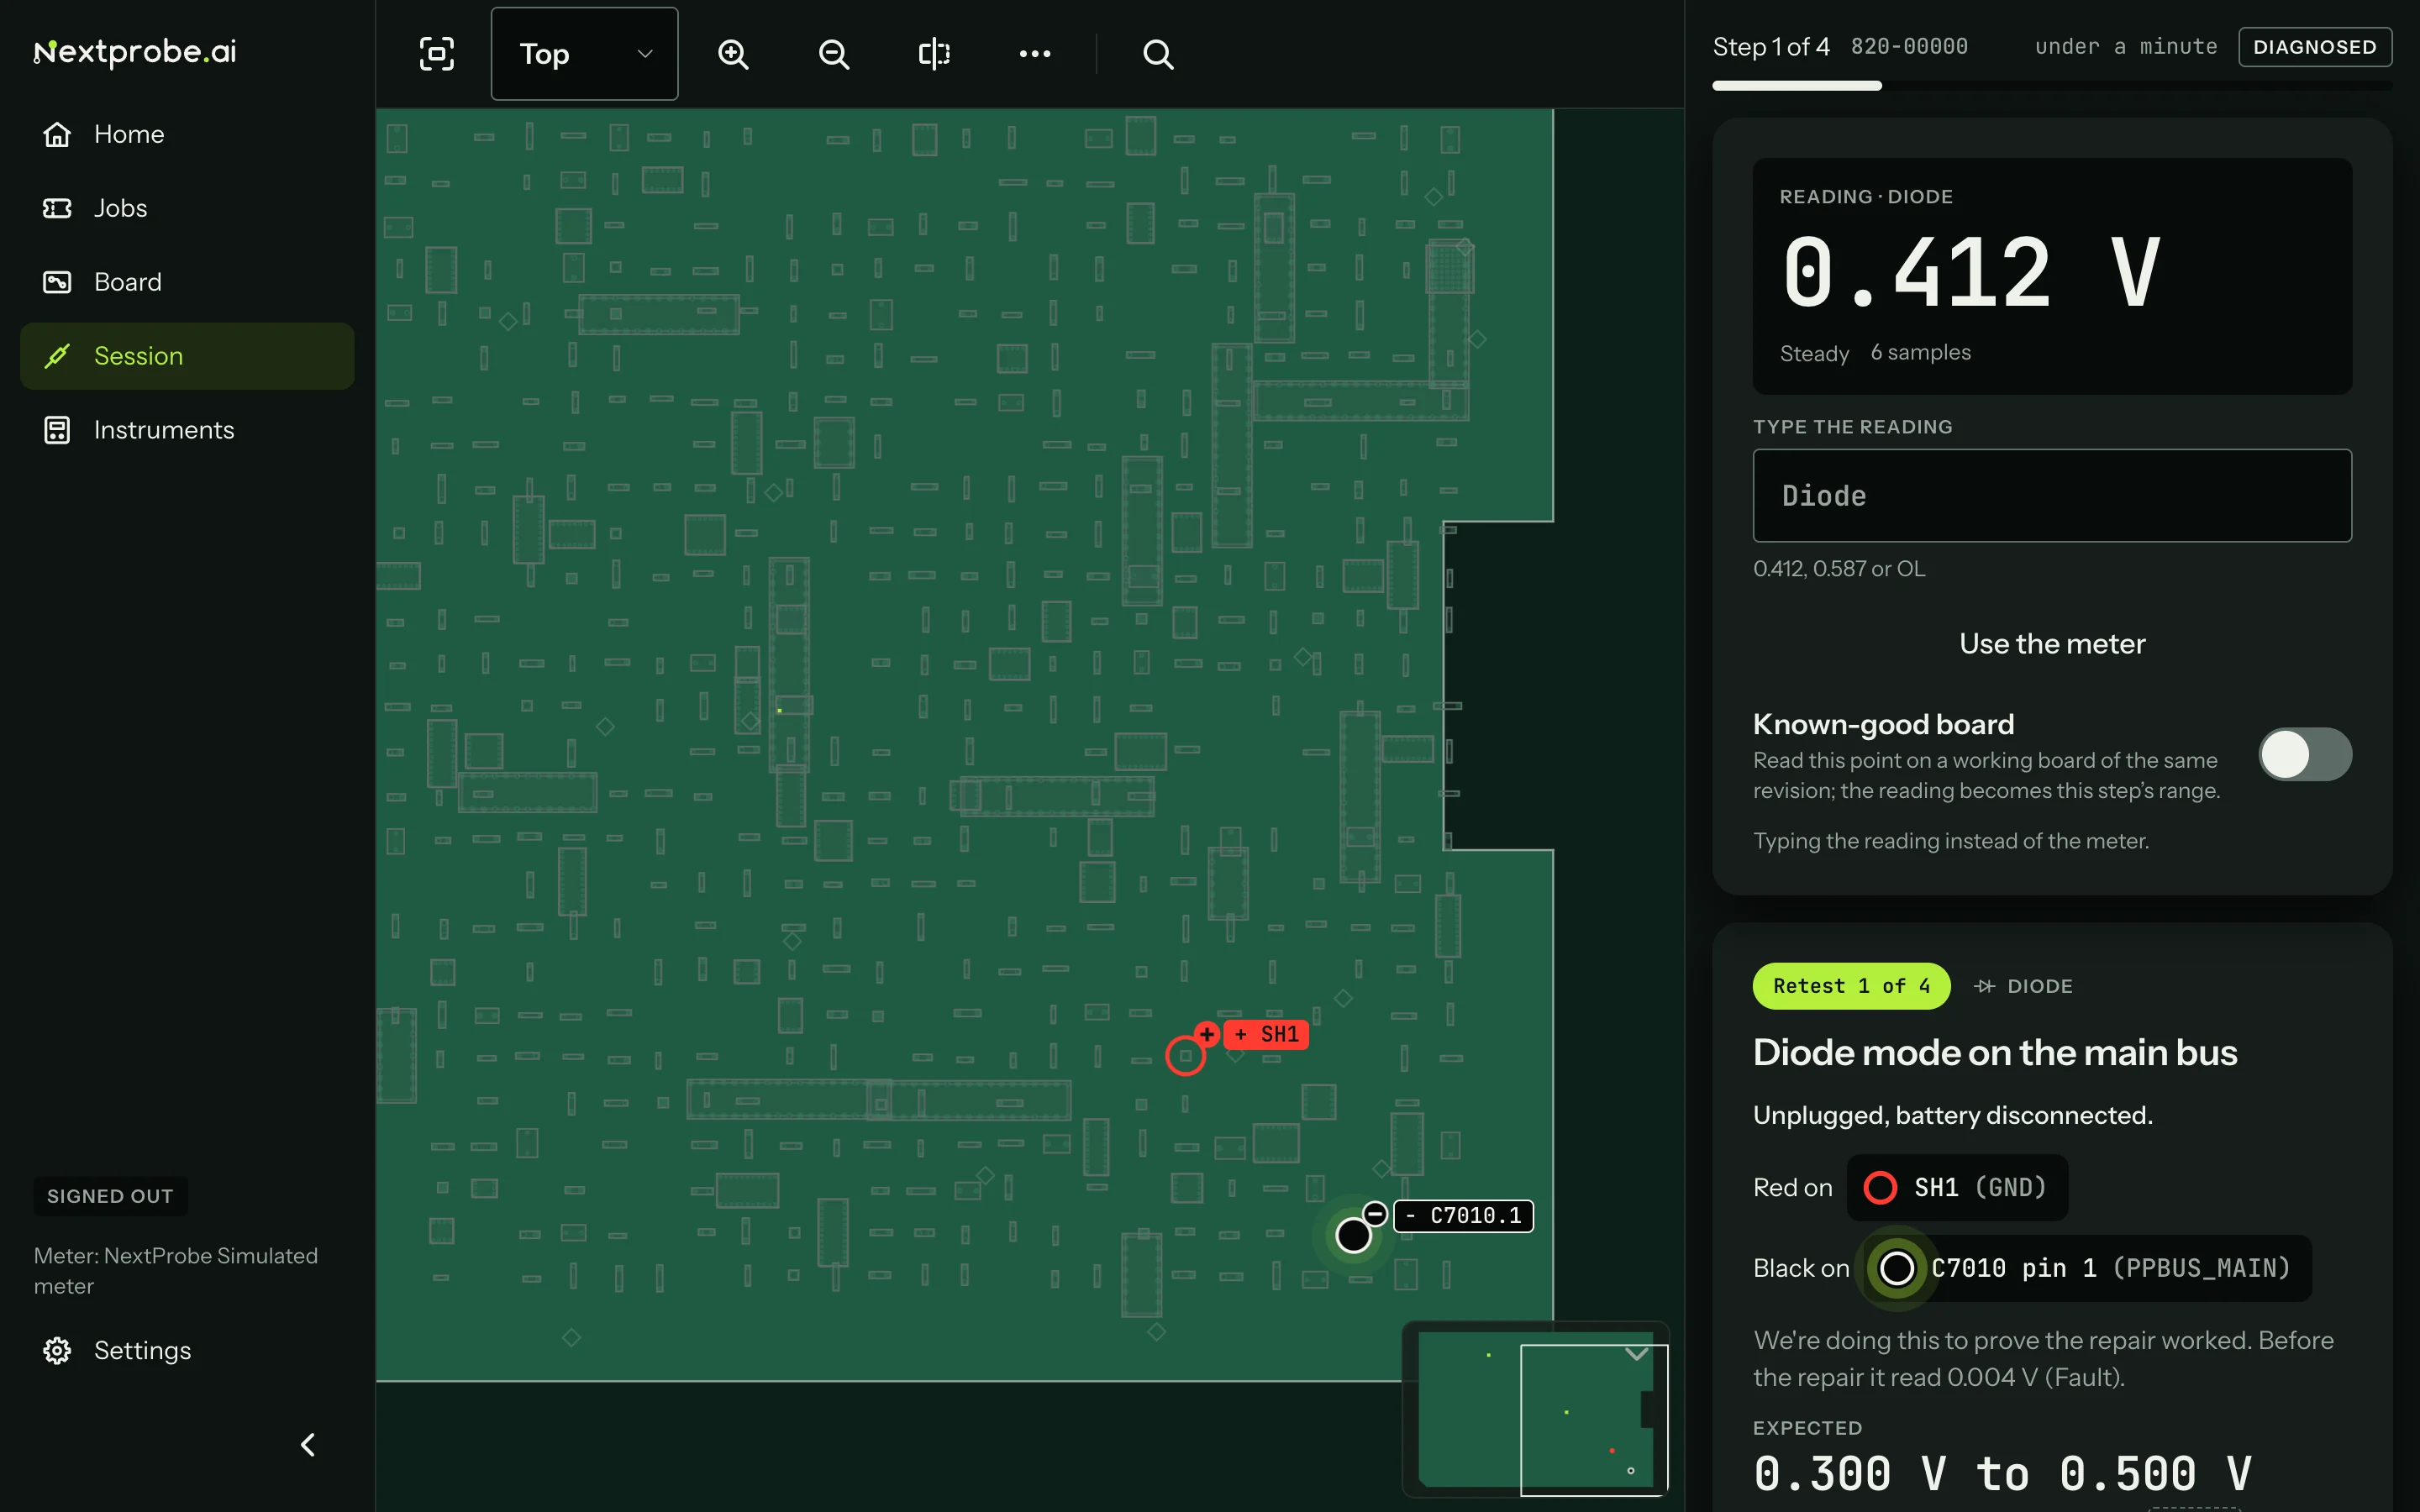
The session is Fixed, with each point before and after the repair.
10. Make the reports
Scroll down to Reports: sign the work off, then Make report… for the tech report, the customer report or the job sheet. See Reports.
Next
- Set up the bench for your own board files and meter.
- Start a session for everything on the session screen.
- Tools in a session for Measure here, the short hunter and the rest.