

Appearance
Schematics
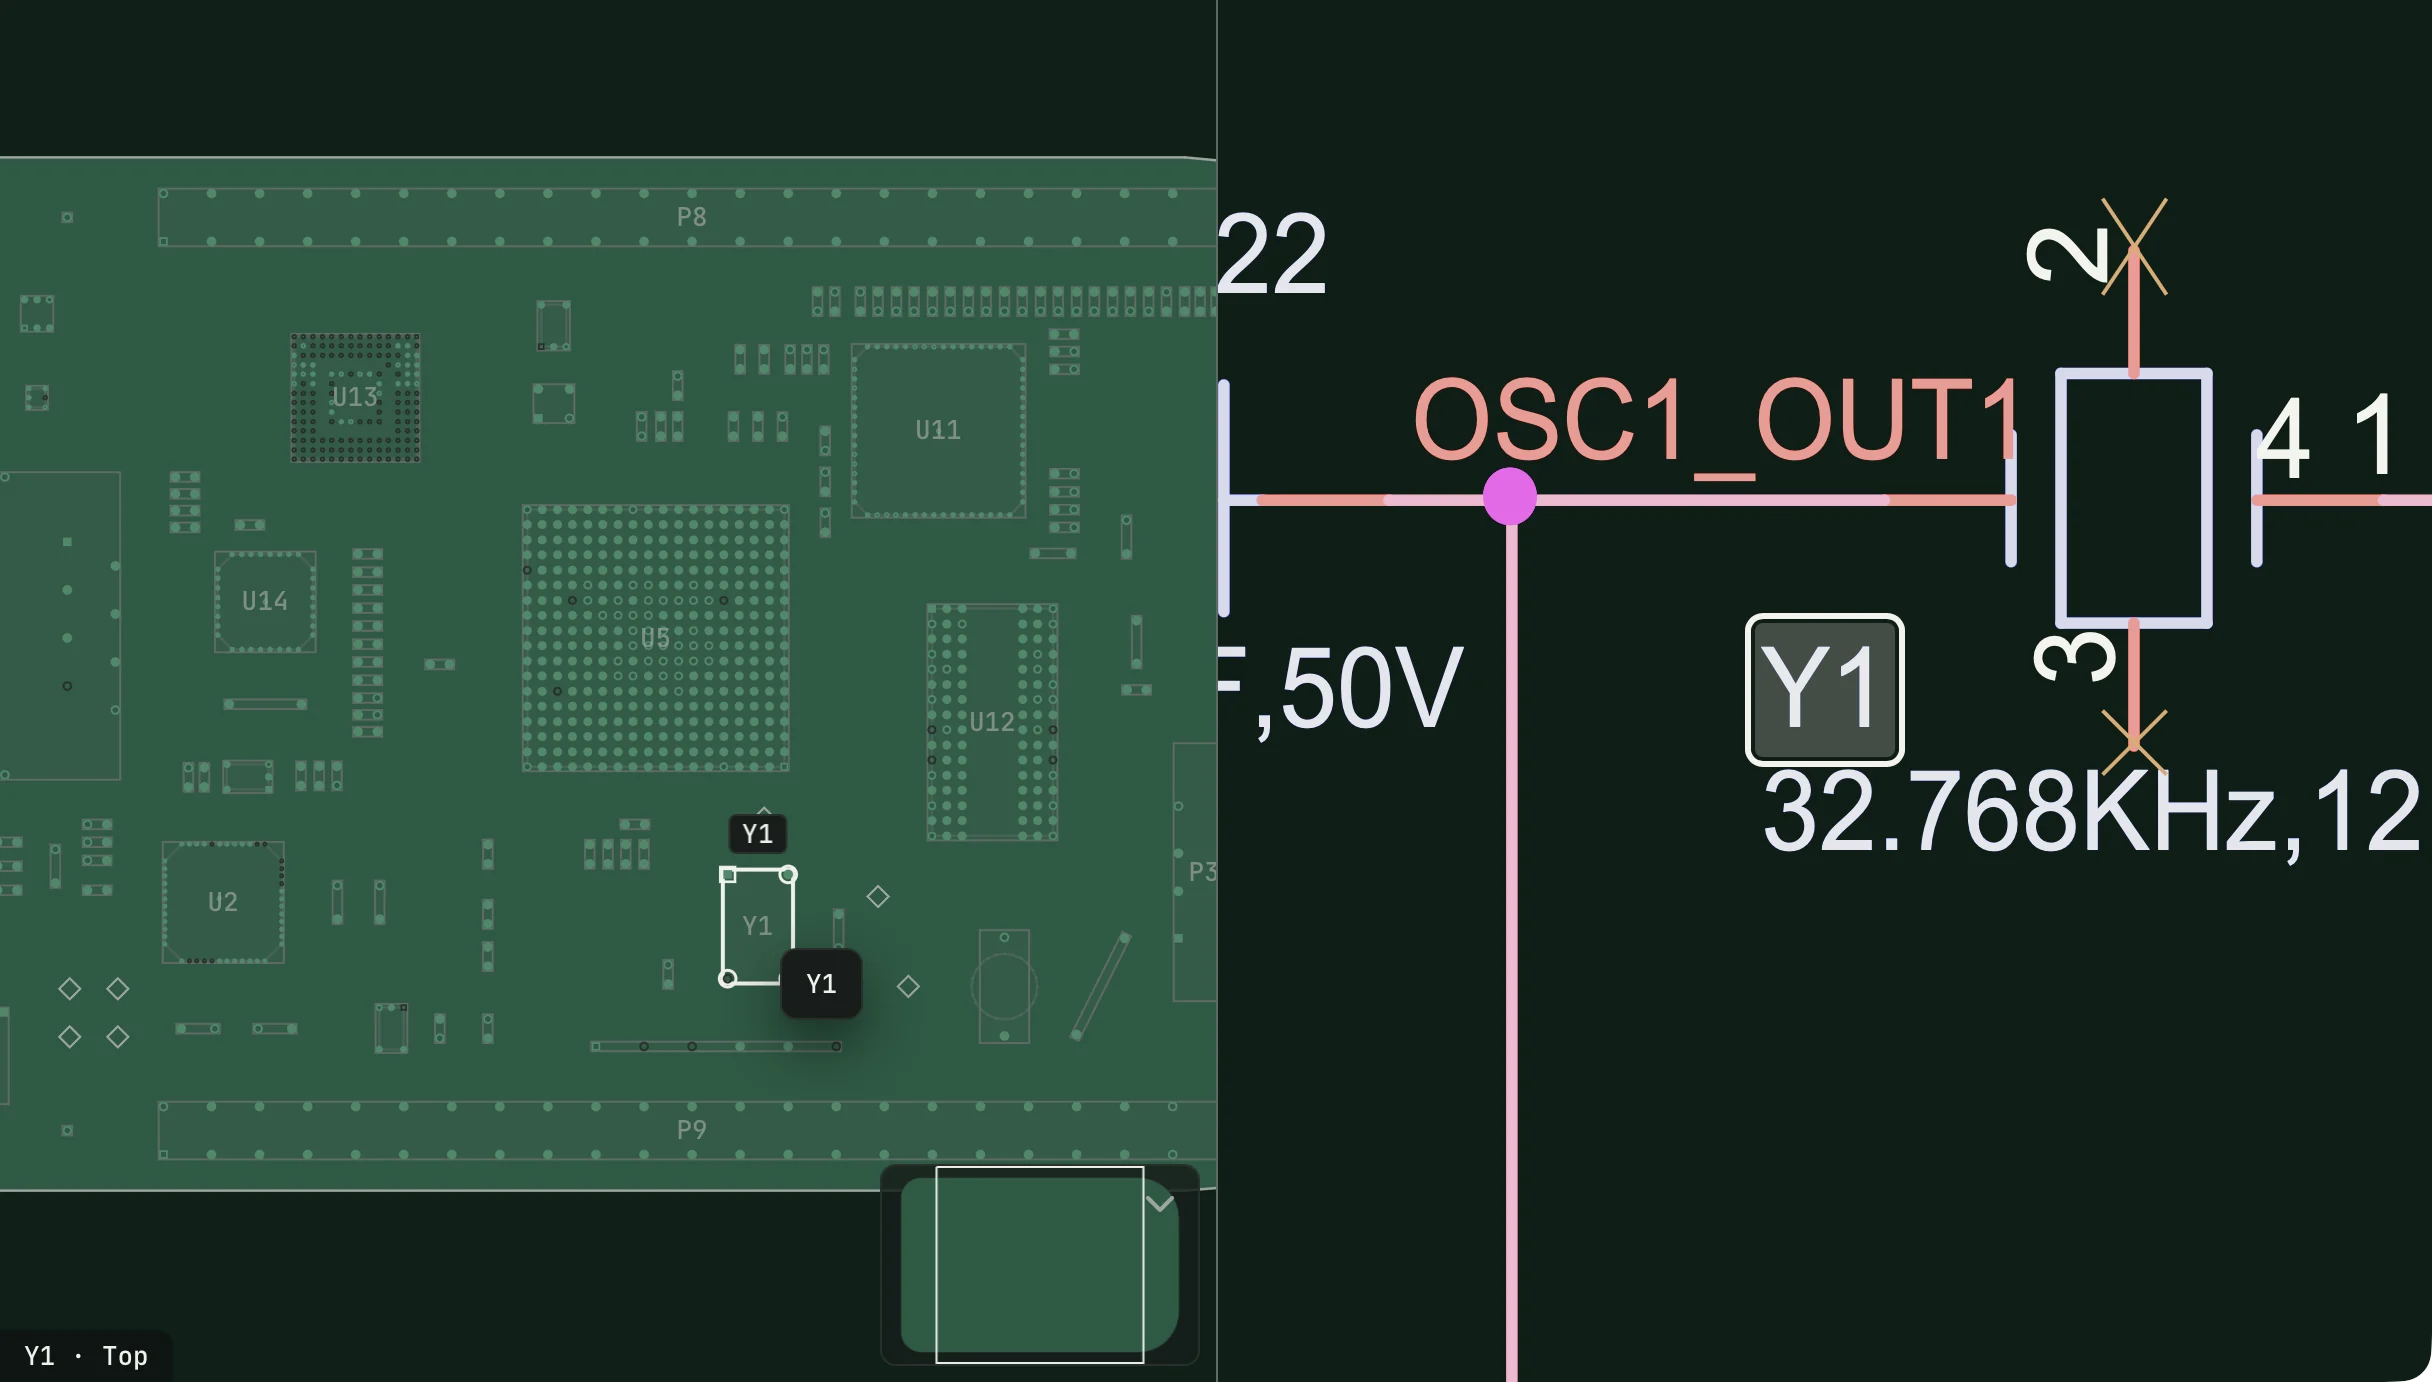
Open the board's schematic PDF beside the boardview and the two work together. Click a part on the board and the schematic jumps to it. Click a name on the schematic and the board zooms to it. During a session, each new step turns the schematic to the part being measured.
Like your board files, the PDF is read on your computer and never uploaded.
Opening a schematic
- Open schematic on Home, on the board card, or in the board toolbar on the session screen.
- File → Open Schematic (⇧⌘O on a Mac, Ctrl+Shift+O on Windows).
- Drag the PDF onto the window.
With a library folder set up (Set up the bench), the schematic for a picked board is found and opened with its boardview.
Matching the schematic to the board
The bench matches a schematic by its contents if it has seen the file before. Otherwise it looks for the board number in the file name or in the title block of the first pages. A matched schematic is remembered with the board, and opens beside it from then on.
If the bench can't find a number, or finds a different one, the schematic's toolbar says "Not matched to a board" (or "Not matched, looks like" and the number it found), with a Use with button for the board in hand. Press it to file the schematic under this board.
Side by side or in tabs
When the window is wide enough, the board and the schematic sit side by side with a divider between them. Drag the divider, or focus it and use the arrow keys, to share the space. The Schematic button on the board toolbar hides and shows the schematic.
In a narrower window, such as the session screen on a laptop, a Board and Schematic tab bar switches between the two. Both stay loaded, so switching is instant. The bench remembers the layout you chose.
Moving around the schematic
The schematic toolbar holds, from left: the file name and its match, Pages, the page arrows with a page number you can type into, Find, the places where the selected name appears, Fit, More and Close. On a narrow pane, Pages, Fit and the places fold behind More.
Drag to pan and scroll to zoom. Plus and minus zoom, 0 or Home fits the page, and Page Up and Page Down turn pages.
Finding and cross-probing
Find on the schematic searches every part and net name in the PDF. Pick a result to select it: every place it appears is boxed, and the previous and next arrows step through them. A 100-page schematic is read in the background when it opens; until that finishes, Find says "Reading names" with the page it has reached.
Cross-probing works both ways:
- Click a part or pad on the board, or pick it in the board's Find, and the schematic jumps to the first place it appears.
- Click a name on the schematic, or pick it in the schematic's Find, and the board zooms to it and selects it.
- Find on the schematic in the board's right-click menu, or the inspector's Schematic button, brings the schematic forward even if its tab was behind the board.
- Right-click a name on the schematic for Zoom to, Find on the board and Copy.
When a name exists on one side only, its status line says so: "C7010 is not in this board file" or "PP3V3_S5 is not in this schematic".
Linking names that are spelt differently
Boardviews and schematics sometimes spell the same net differently: PP3V3_S5 on the board and PP3V3_S5_SMC on the schematic. When a cross-probe misses, the schematic's status line offers Link to and the nearest names from the other side. Pick the right one and the two names are linked for every copy of this board's schematic on this bench. The status line then says the name is linked, with Unlink beside it.
Bookmarks and colours
Pages lists every page. The bookmark toggle on each row marks the pages you keep going back to (the power sequence, the charger, the system controller) and lists them at the top, one click away. Bookmark this page is also in More.
The schematic is drawn in the same dark look as the board. If a schematic relies on its own colours, choose Original colours in More to draw it as printed.
Bookmarks and the colour choice are kept for each file on this bench.
During a session
Each new step turns the schematic to the part being measured. The target net is drawn in the probe colour, and the parts under the red and black leads are boxed in their lead colours with their tags.
Scanned schematics
A scanned PDF has no text in it, only pictures of pages. The pages display as normal, but the schematic says "This PDF has no text layer, so names in it cannot be found or cross-probed." Use a text PDF of the schematic if you can find one.
Something not working?
See Troubleshooting: schematics, or get help.